
How to Host Obsidian Vaults on IPFS

Steve Simkins
As technology has advanced and more services are shipped to the cloud, there is one thing slowly slipping through users fingers: ownership. A great example of this is in note taking apps. Apple Notes doesn’t have a raw file system where you can access your notes. Sure it can export them, but what happens if the note is gone before you can do that? How can you keep up as you continually edit them? Other apps out there like Notion (sorry Notion we love too) don’t have a local-first option and once again your work, your ideas, are stuck in a cloud. For those who truly hold a “file over app” mentality there is really only one app that stands out: Obsidian.
Not only does Obsidian store your notes as cold hard markdown files on your computer, it also hosts a multitude of features that can help you build whatever you truly want. Whether it’s a second brain or a simple journal, Obsidian is an elegant piece of software built on open tech principles. Hosting your Obsidian vault as a website isn’t anything too new, however hosting it on platforms that hold to an open web is a bit less common. Orbiter’s approach is novel and arguably hasn’t been done before, using a combination of IPFS and blockchain that is totally abstracted from the user but open and accessible to anyone. In this post we’ll show you how you can host your Obsidian vault on Orbiter and heed to “file over app.”
Installation and Setup
Getting your Obsidian vault and Orbiter site in sync does take a little bit of time initially, but once all our ducks are in a row, updating and adding to your site is a breeze. So grab your favorite beverage and let’s get started.
The first thing you’ll want to do is create a free Orbiter account. Once you’re logged in you can select one of the default site templates; don’t worry about the contents as it will soon be replaced by our Obsidian vault. Be sure to give it a unique name like “steves-vault.orbiter.website,” then click “create.” One more thing we need to do in Orbiter is make an API key. Visit the Keys Page and click “New Key” in the top right and select the “Member” role. Once the key is made save it somewhere safe!
We will assume you already have an Obsidian vault setup, but if you don’t you can do so by visiting https://obsidian.md and downloading the app. Once installed you will want to download the Digital Garden Plugin by click on this link. After you install it you will want to click the “Enable” button. We’ll come back to this plugin in a bit!
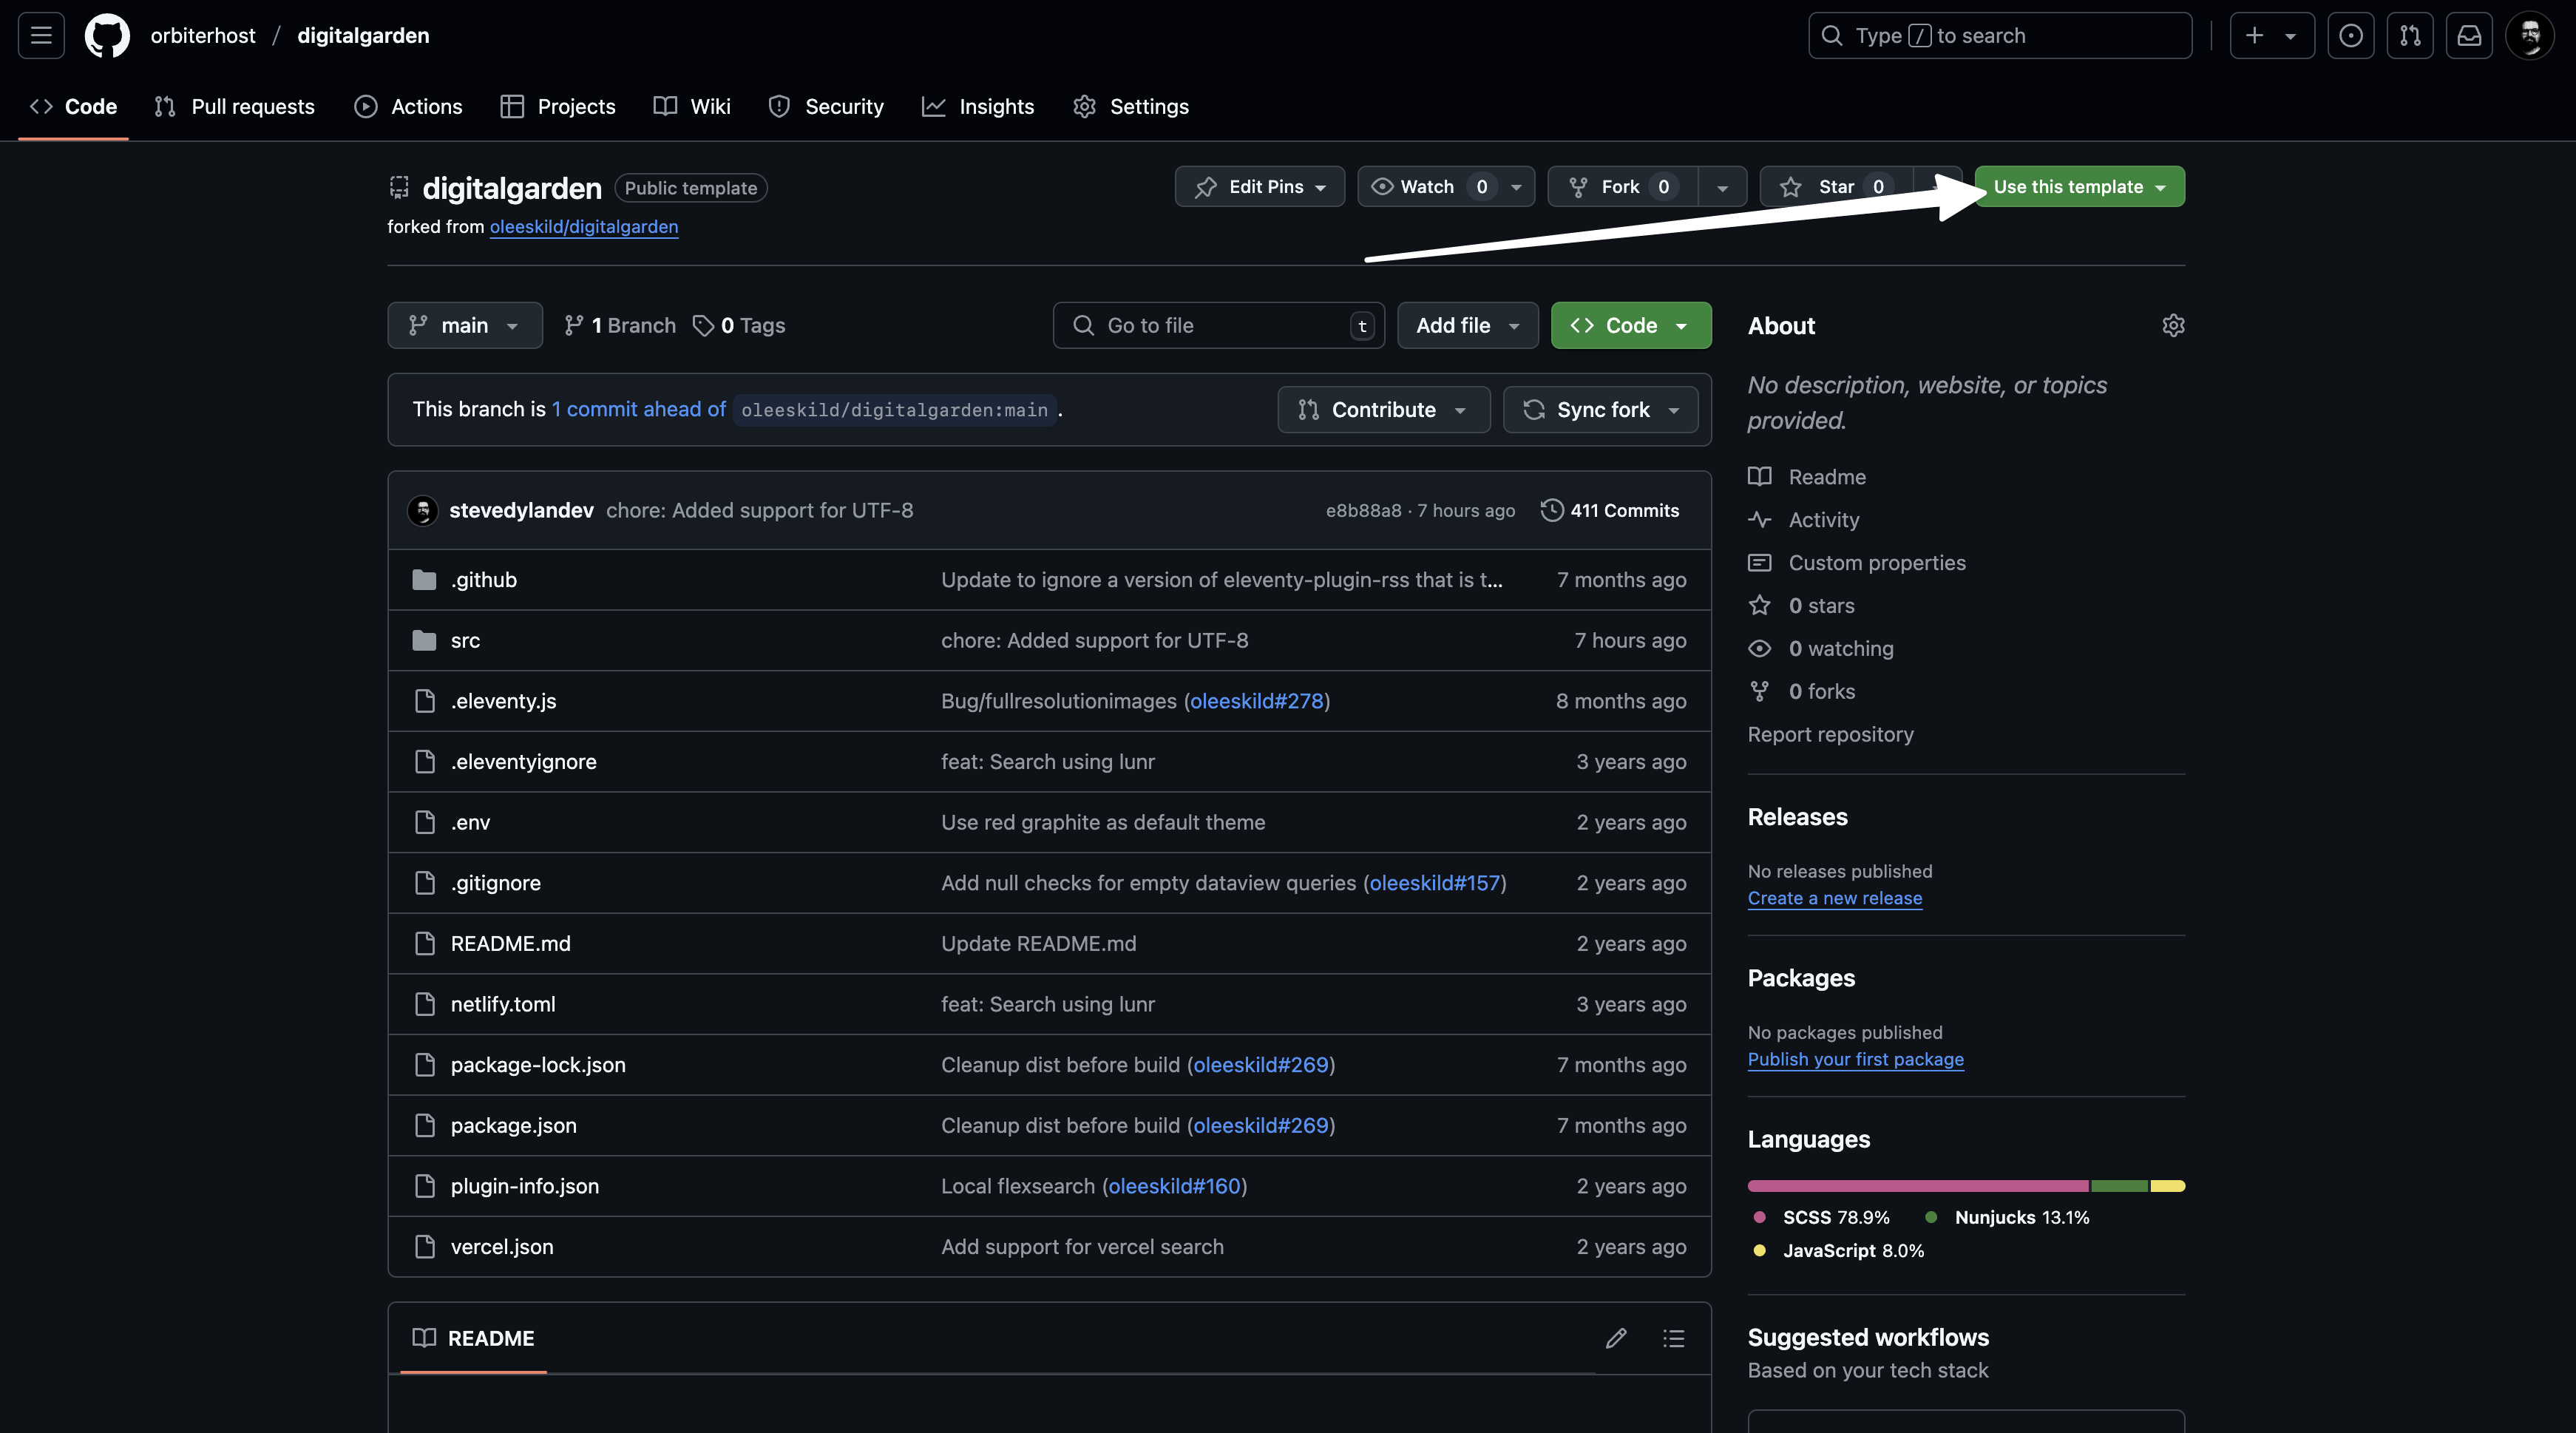
Next thing you’ll need is a free GitHub account if you don’t have one already. Once you’re signed up you’ll want to visit this template and click the “Use this template” button in the top right.
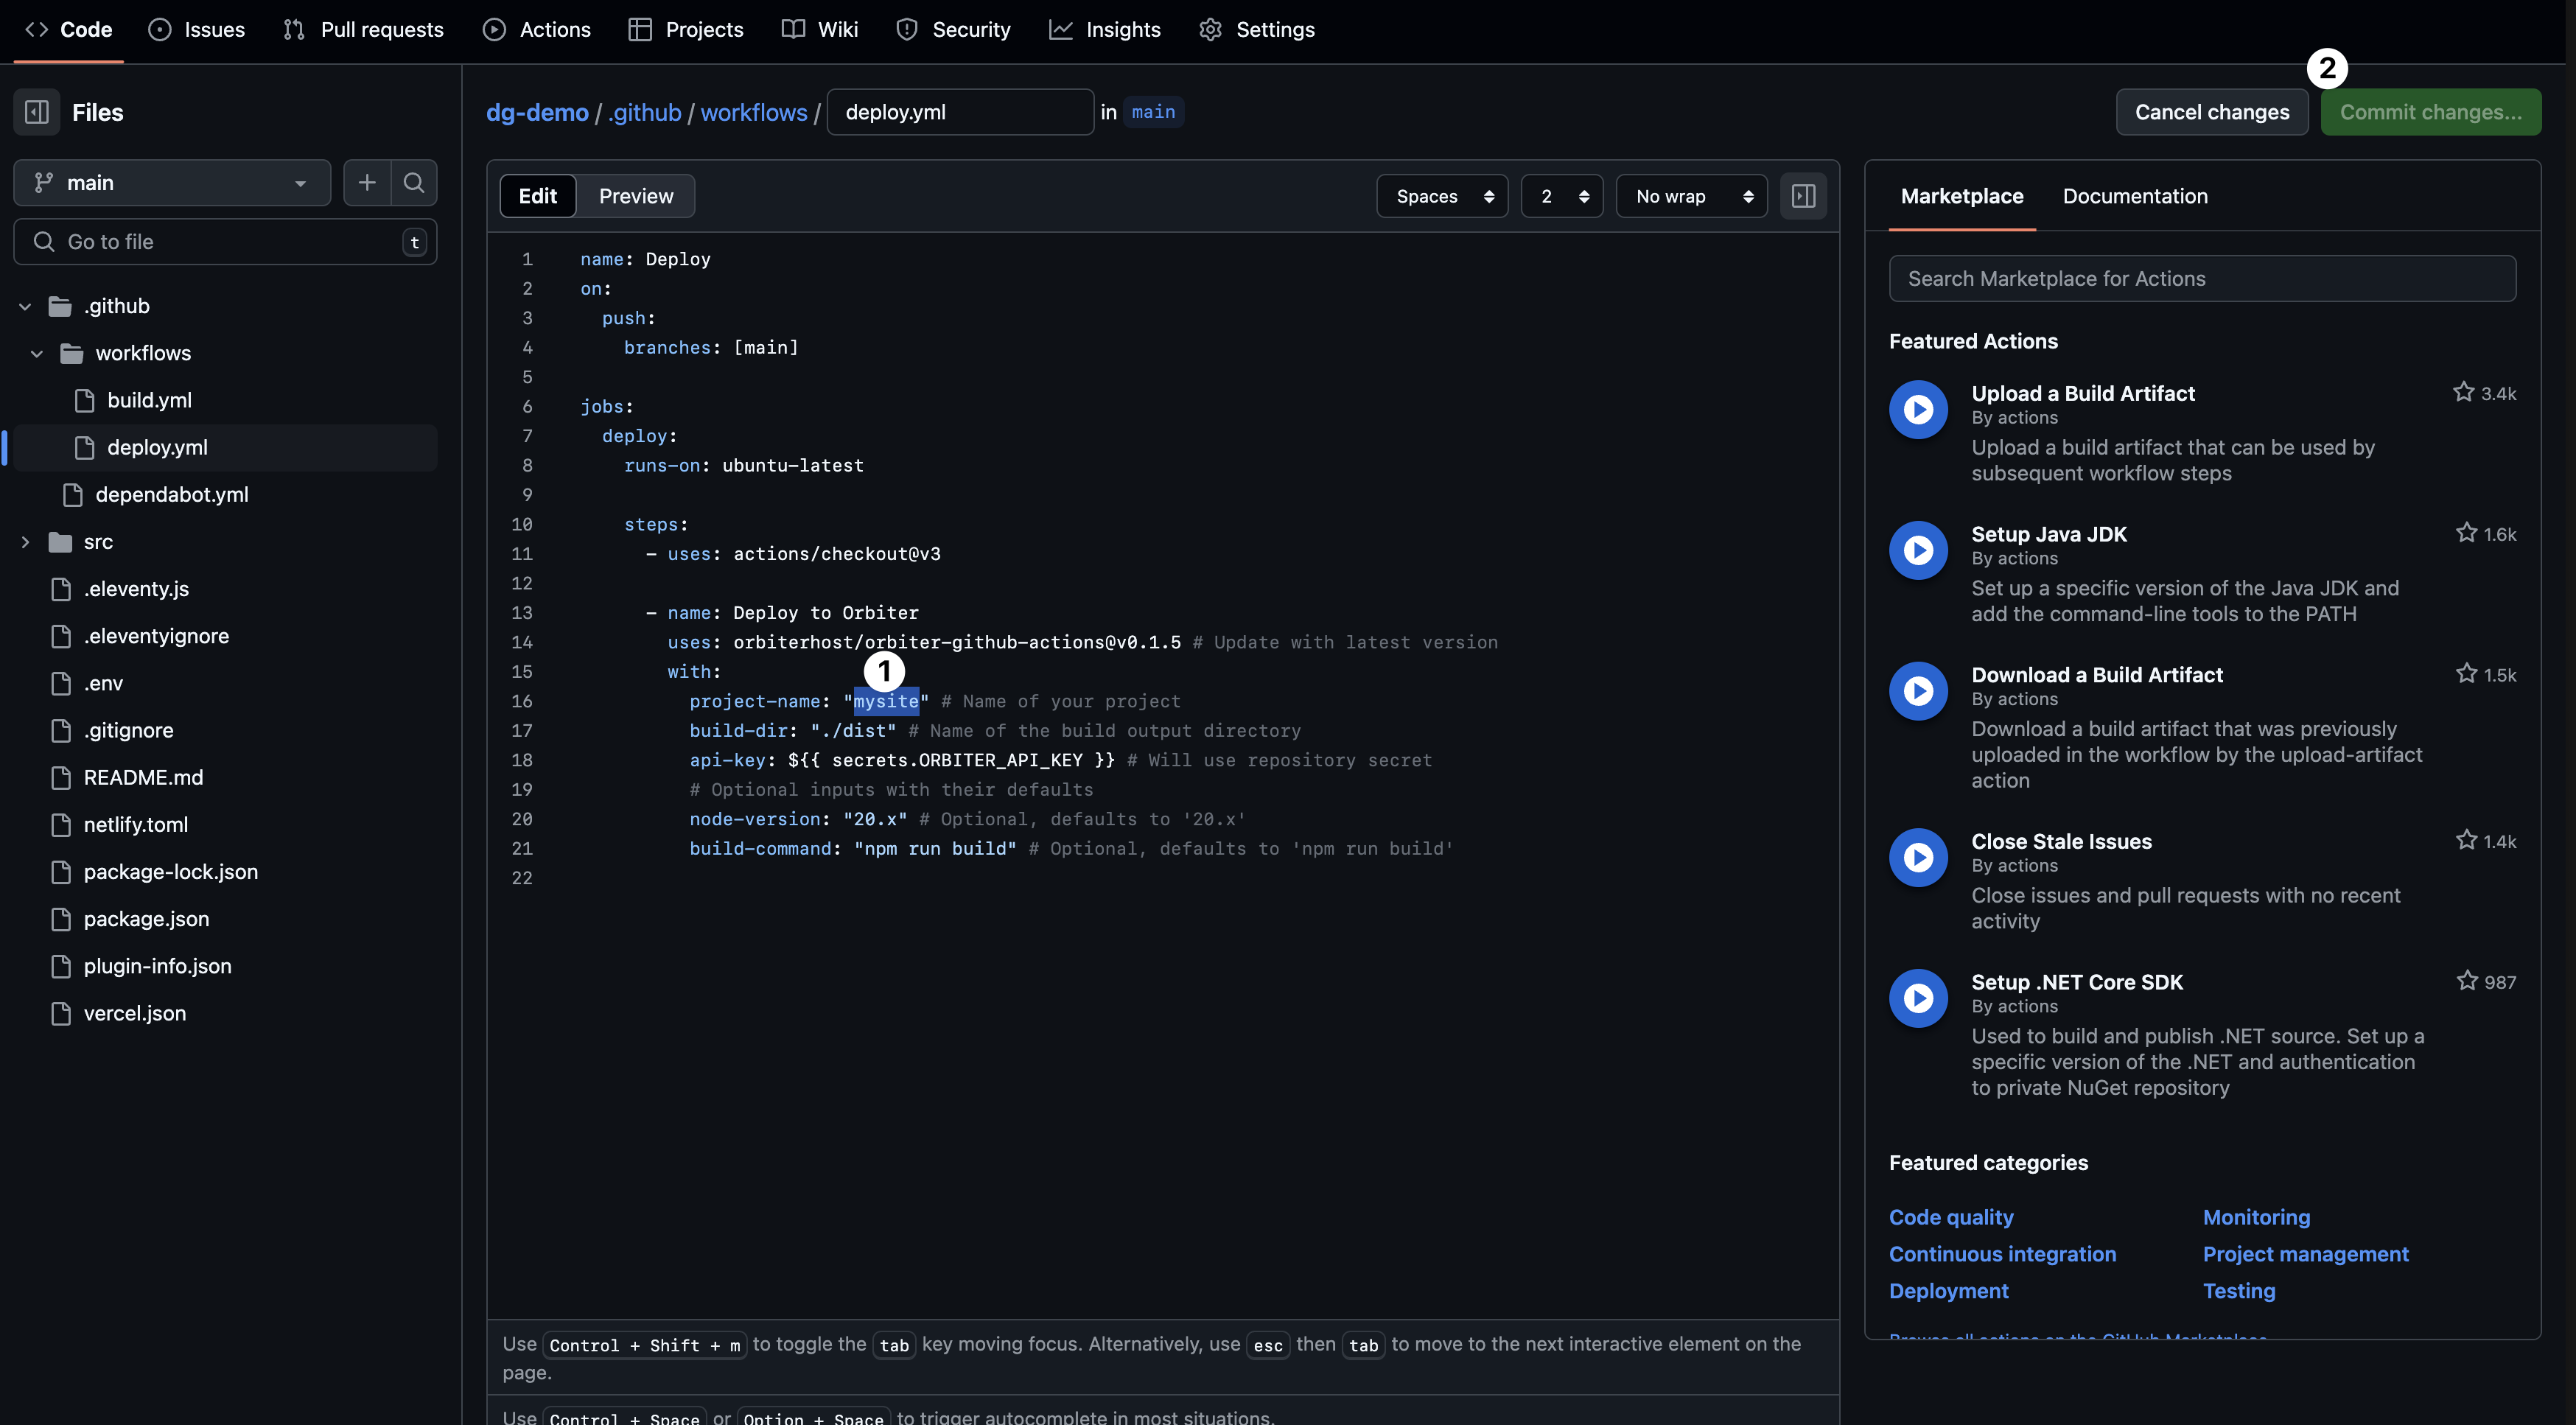
Select “Create a new repository” and give it a name of your choice, then click “create repository.” From the files page click on the .github folder, then the workflows folder, and finally the deploy.yml. This file will contain a GitHub action that deploys our vault to Orbiter anytime there is a new update. Click on the pencil icon in the top right to edit the file, and replace the default "my-site" with the name of the site you deployed on Orbiter earlier, like "steves-digital-garden". Once you do that click “Commit Changes” in the top right and confirm it.
Next thing we need to do is add our Orbiter API key to the repo secrets. Click on the Settings tab, then “Secrets and Variables”, then finally “actions.”
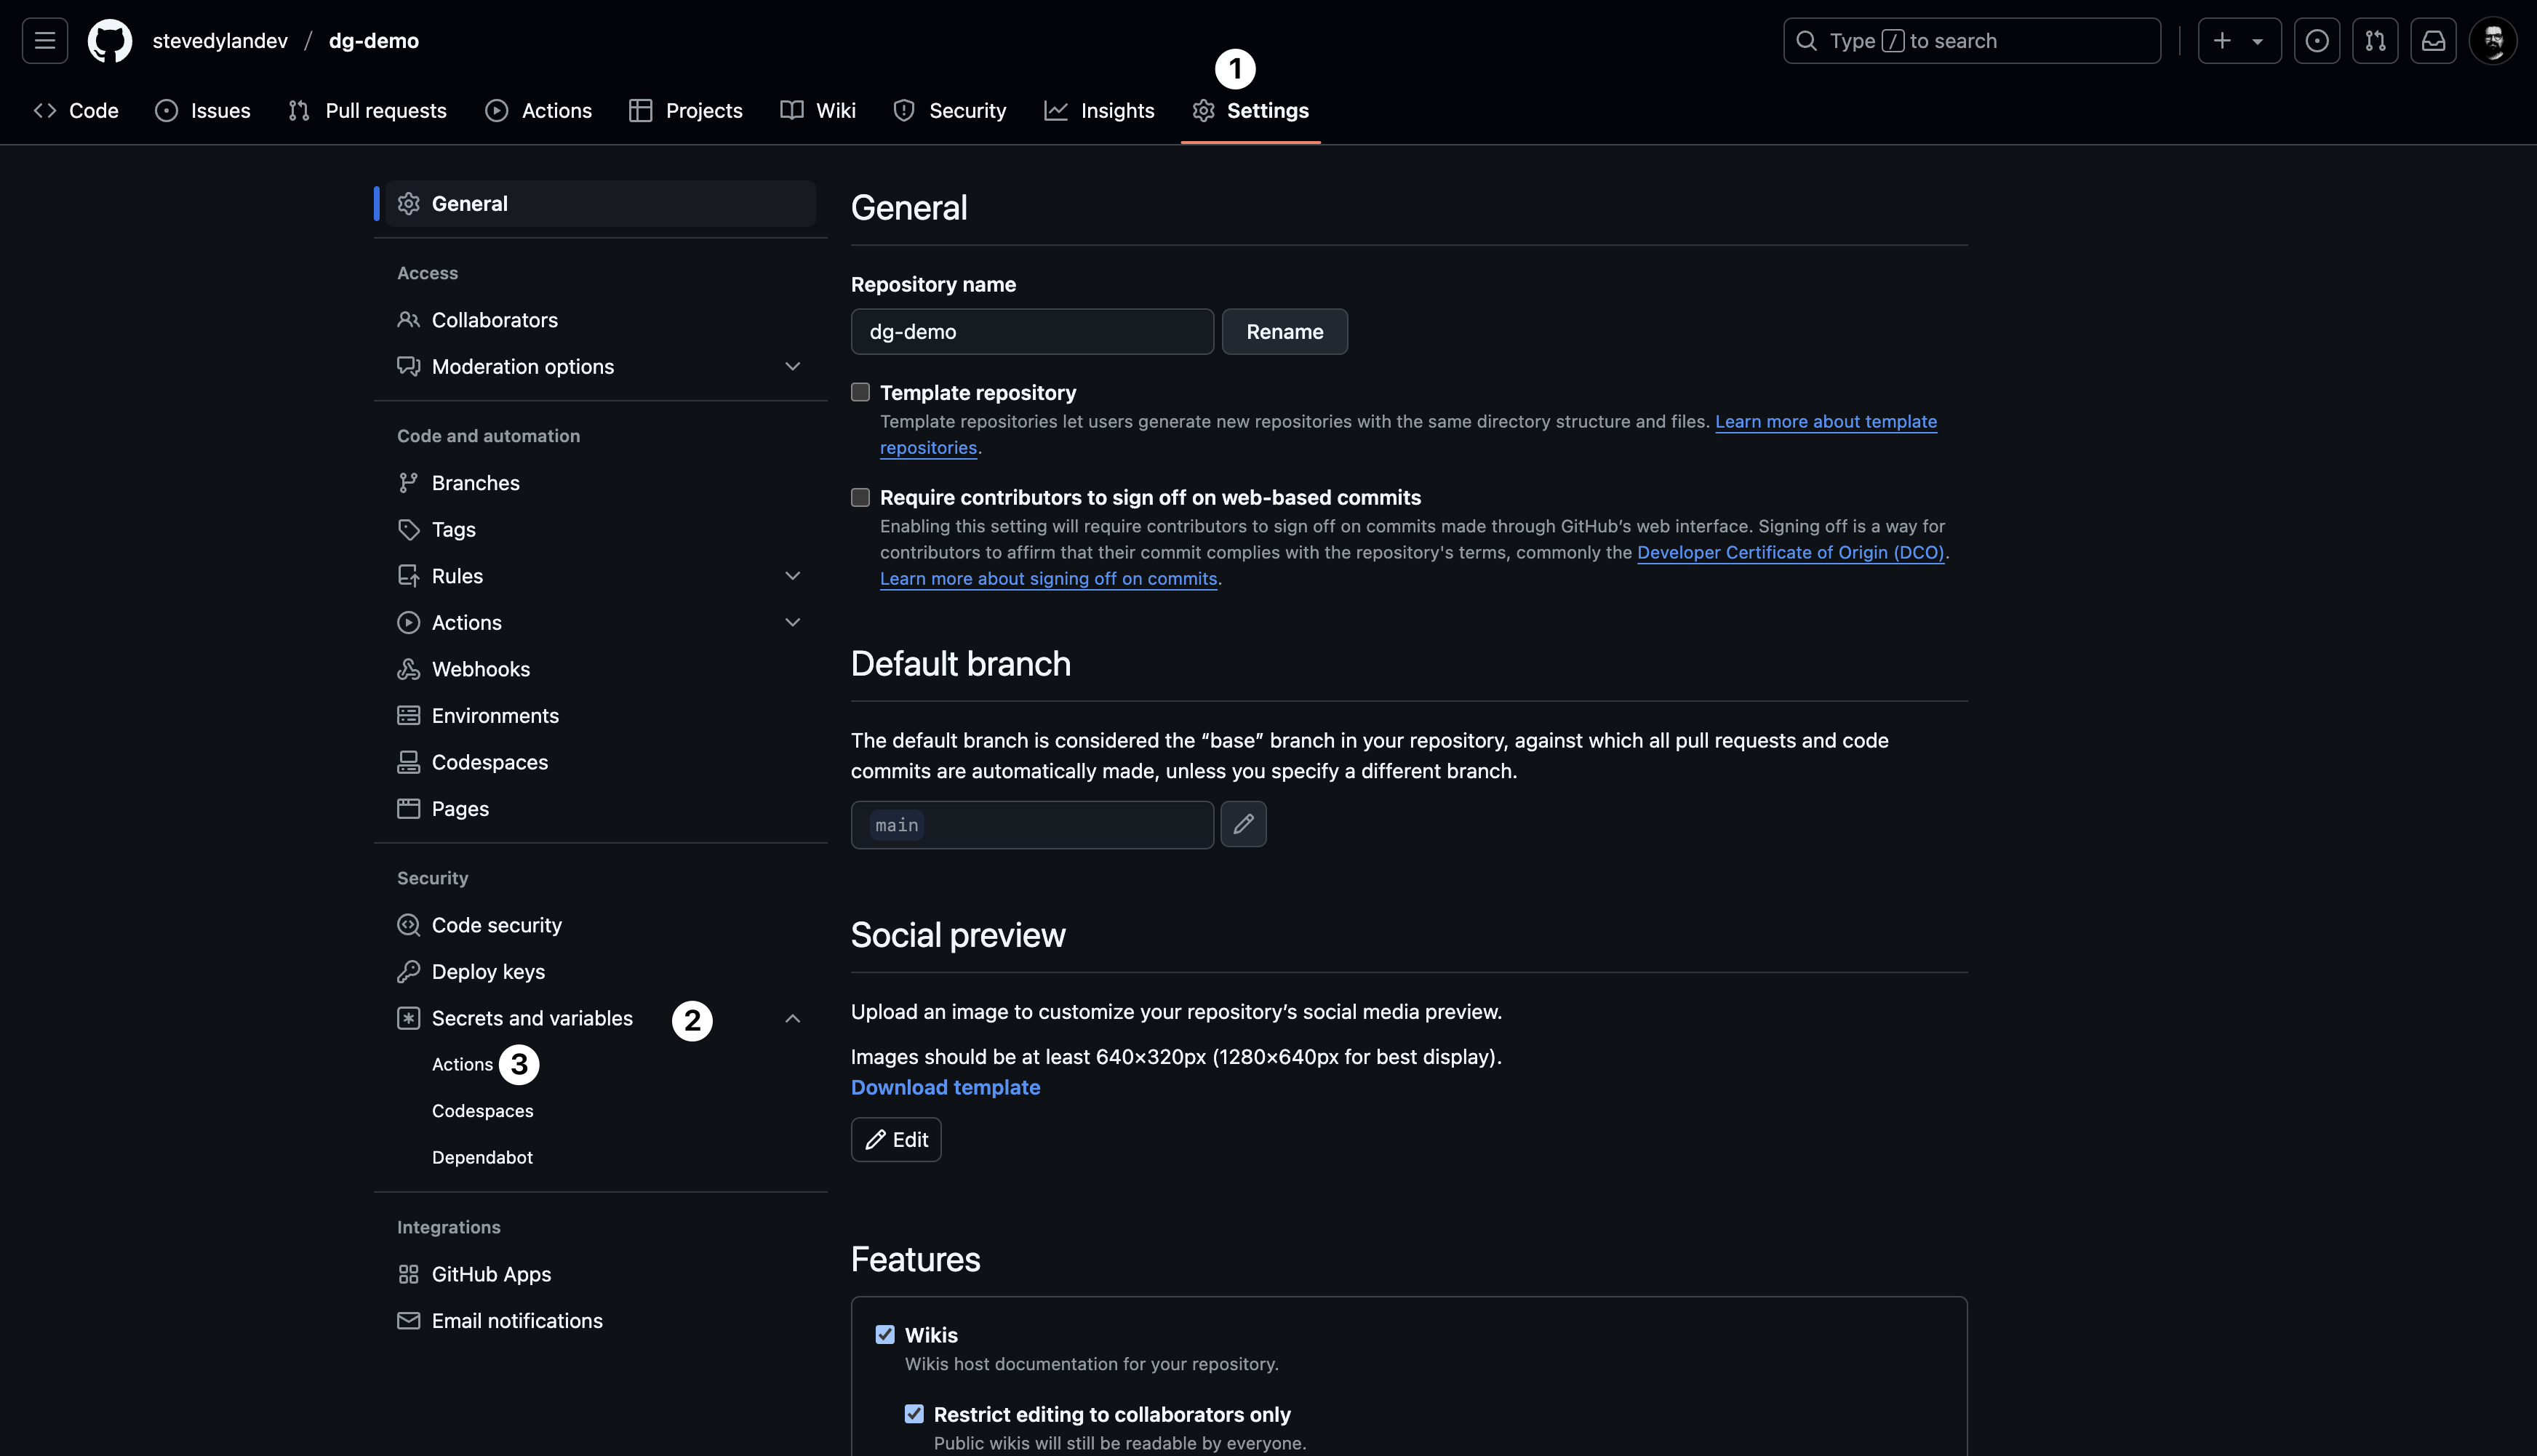
Click “New Repository Secret” and for the name put ORBITER_API_KEY and in the value box put your key, then click “Add Secret” to save it.
We’re almost done in GitHub, and there’s one last thing we need to make in order for our Obsidian plugin to work, which is a fine grained access token. Visit this page and click “Generate new token” in the top right. Give it a name like digital-garden-plugin and an expiration date, or set it to not expire. For Repository Access select “Only select repositories” and then click the drop down to find the repo we just made. Once it’s selected expand the Repository permissions tab and find “Content” and “Pull Requests,” both of these will need to be Read and Write.
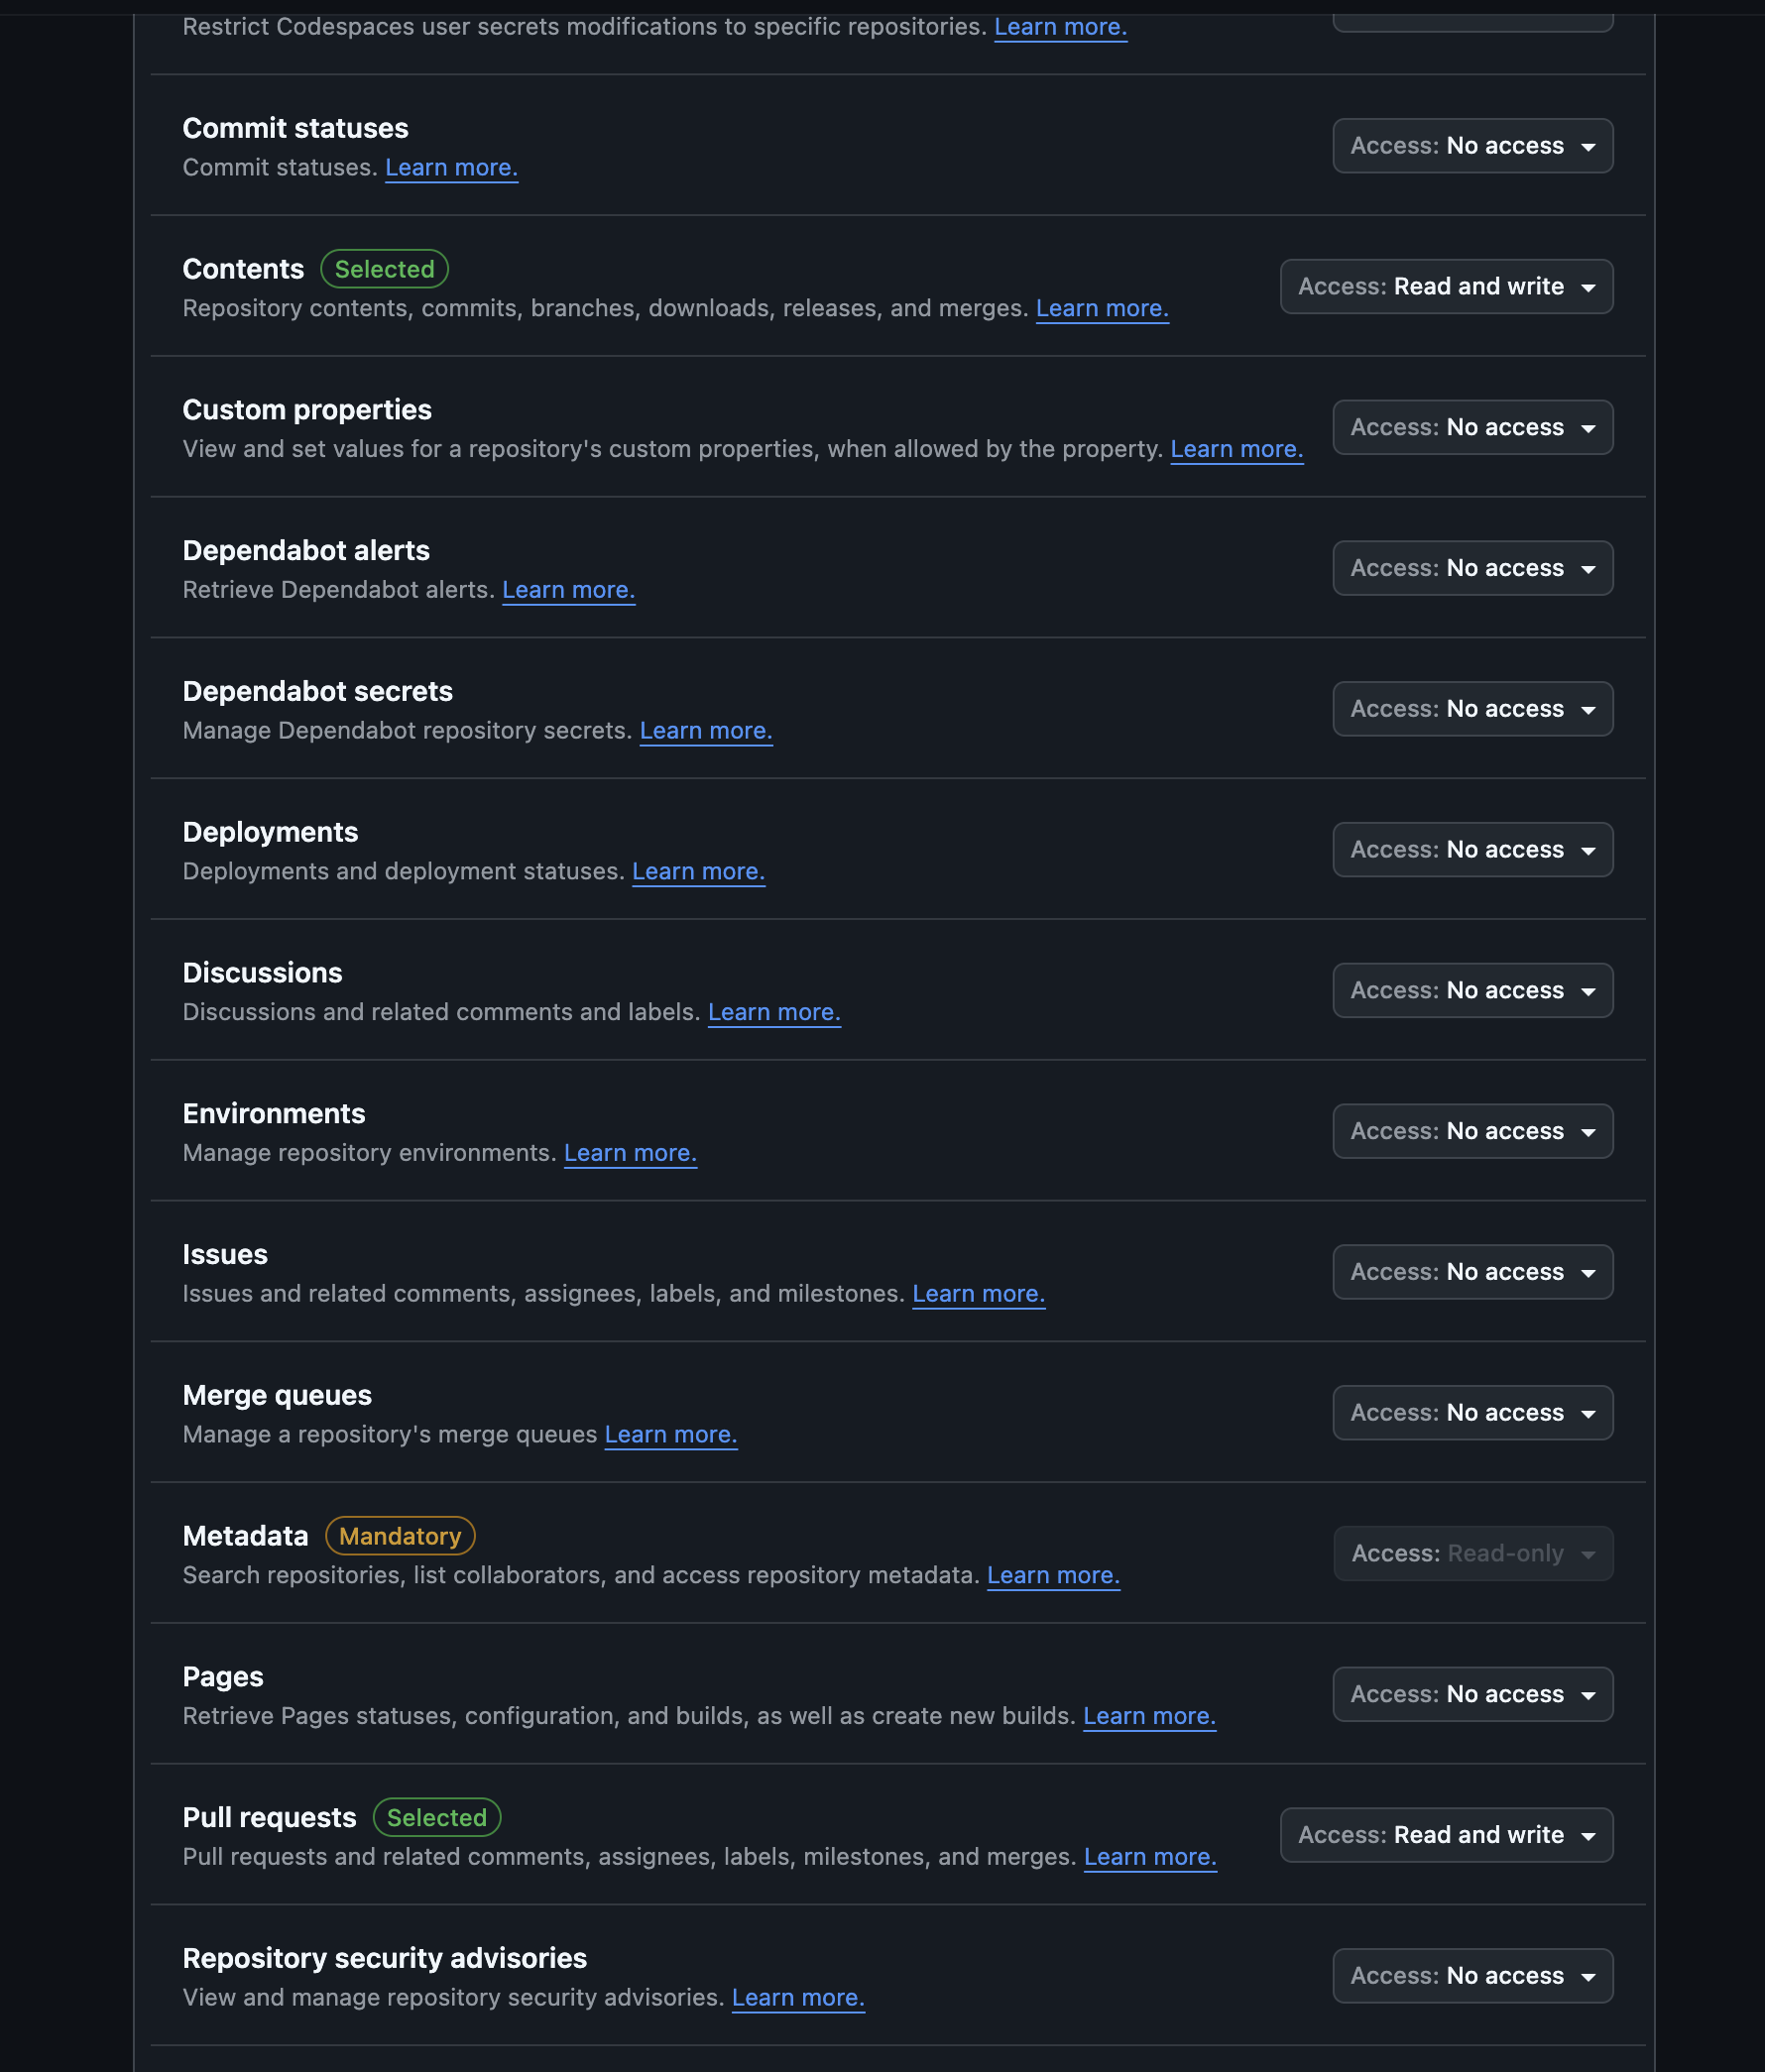
Finally scroll to the bottom and click “Generate token” and save it somewhere safe.
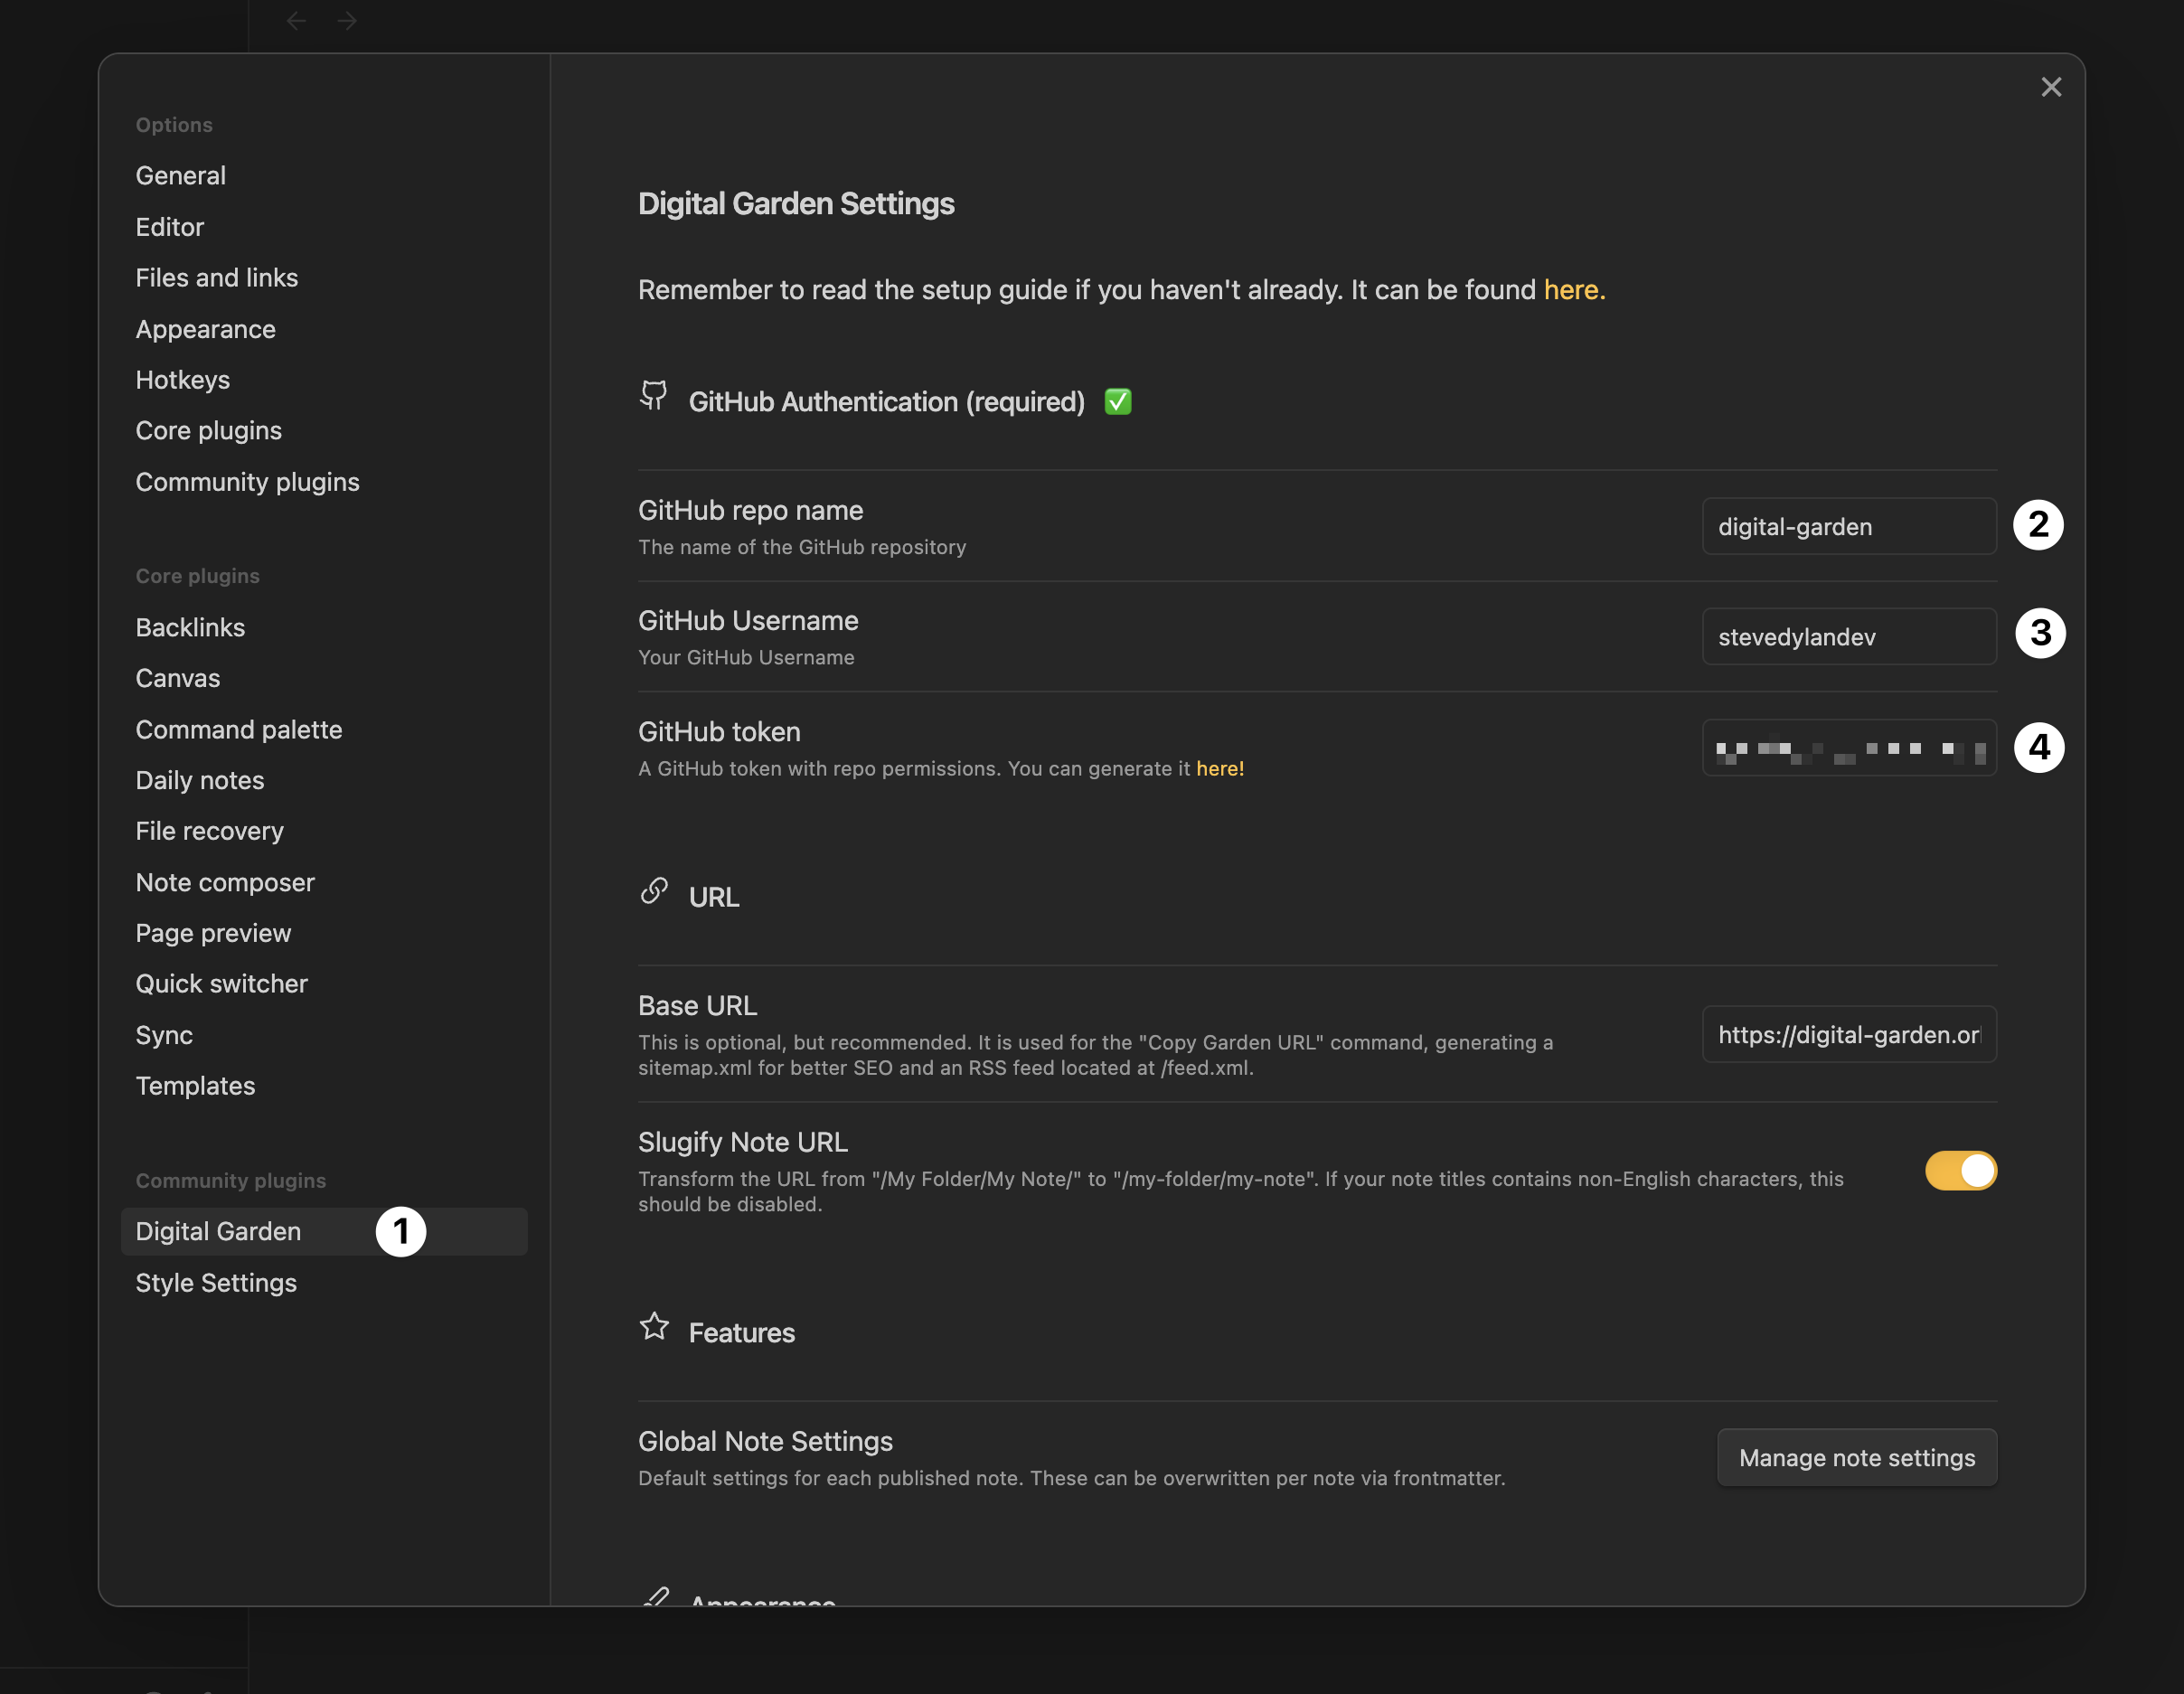
Now moving back into Obsidian, open your settings page and find the Digital Garden Plugin settings in the bottom left. Here you will want to fill out the information at the top such as the repo name, your GitHub username, and your GitHub Token that we just made.
We made it! Yeah that was a bit of a setup process, but you’re gonna love how easy it is to use from here 😎
Writing and Publishing Content
Let’s start making our first webpages and updates. Open Obsidian and make a new page called “Home” and write in some content like you normally would.
# Title

## Welcome to my digital garden! 🌿

Hosted on IPFS and Base through Orbiter!
Now above our main header at the top of the page, below the title, paste the following:
---
dg-home: true
dg-publish: true
---
This is going to add some metadata properties to your page which should now look like this:
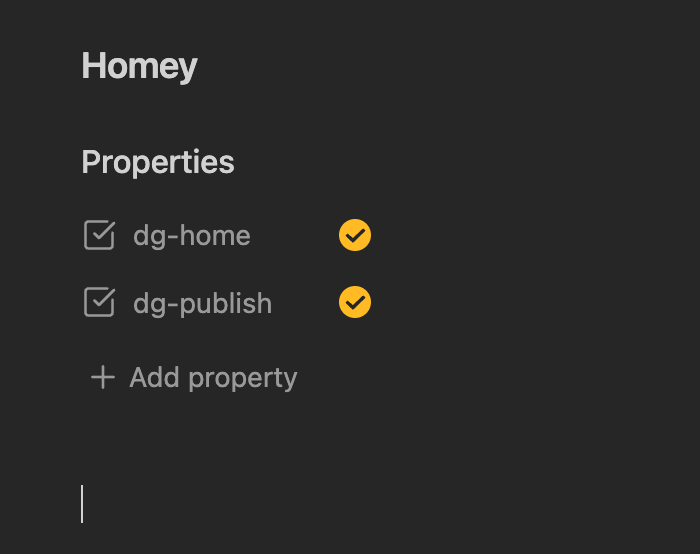
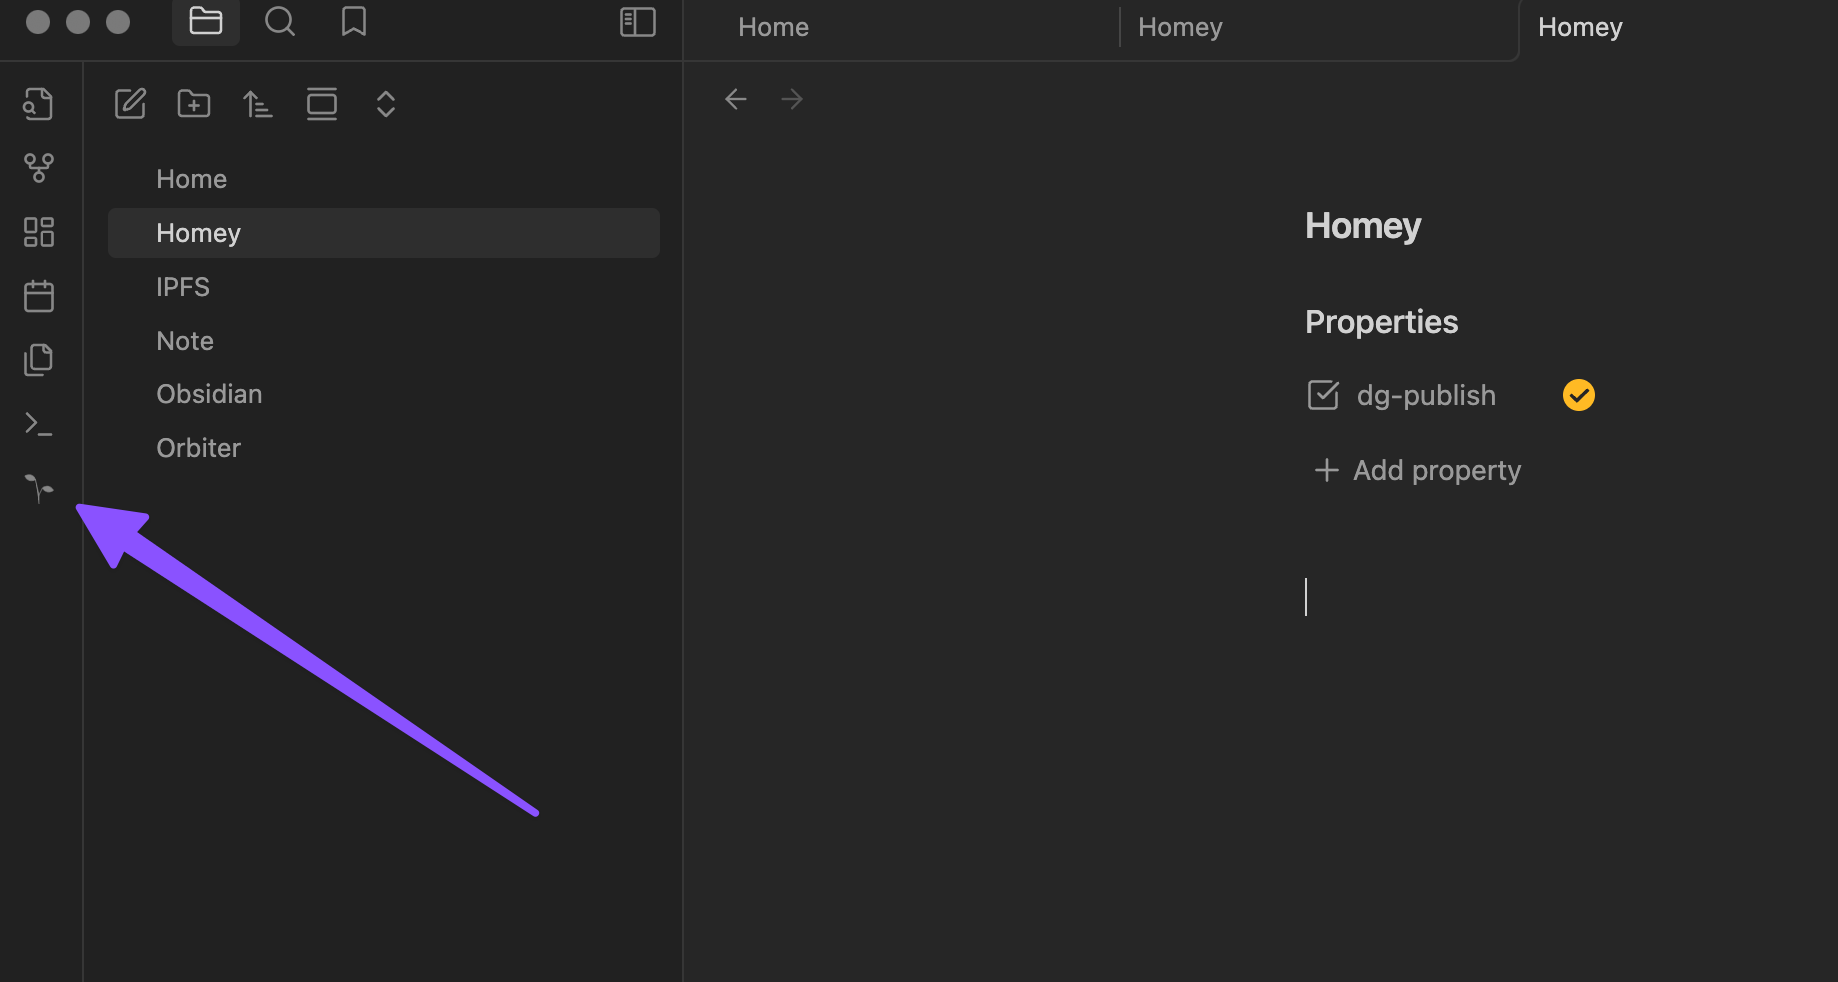
dg-home is going to only be for our home page, and dg-publish is going to be for any page we want to be on our website. Make another page called “Note” and type --- and you should see the properties come back where you can select dg-publish. Make sure it’s checked and write some more in there! Once you’re done and perhaps added a few more notes, it’s time to publish our site. Click on the Digital Garden plugin icon on the left sidebar:
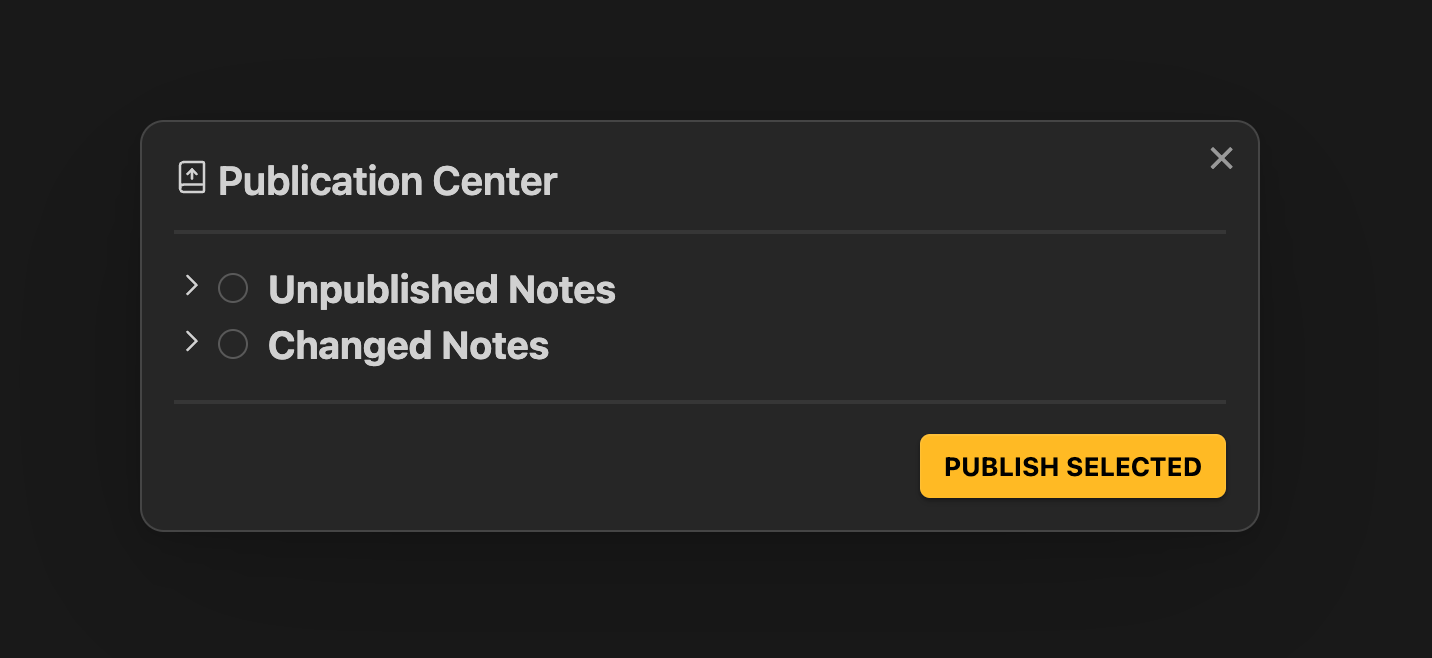
This will bring up a modal where you can select the pages you want to publish, then just hit “Publish Selected”!
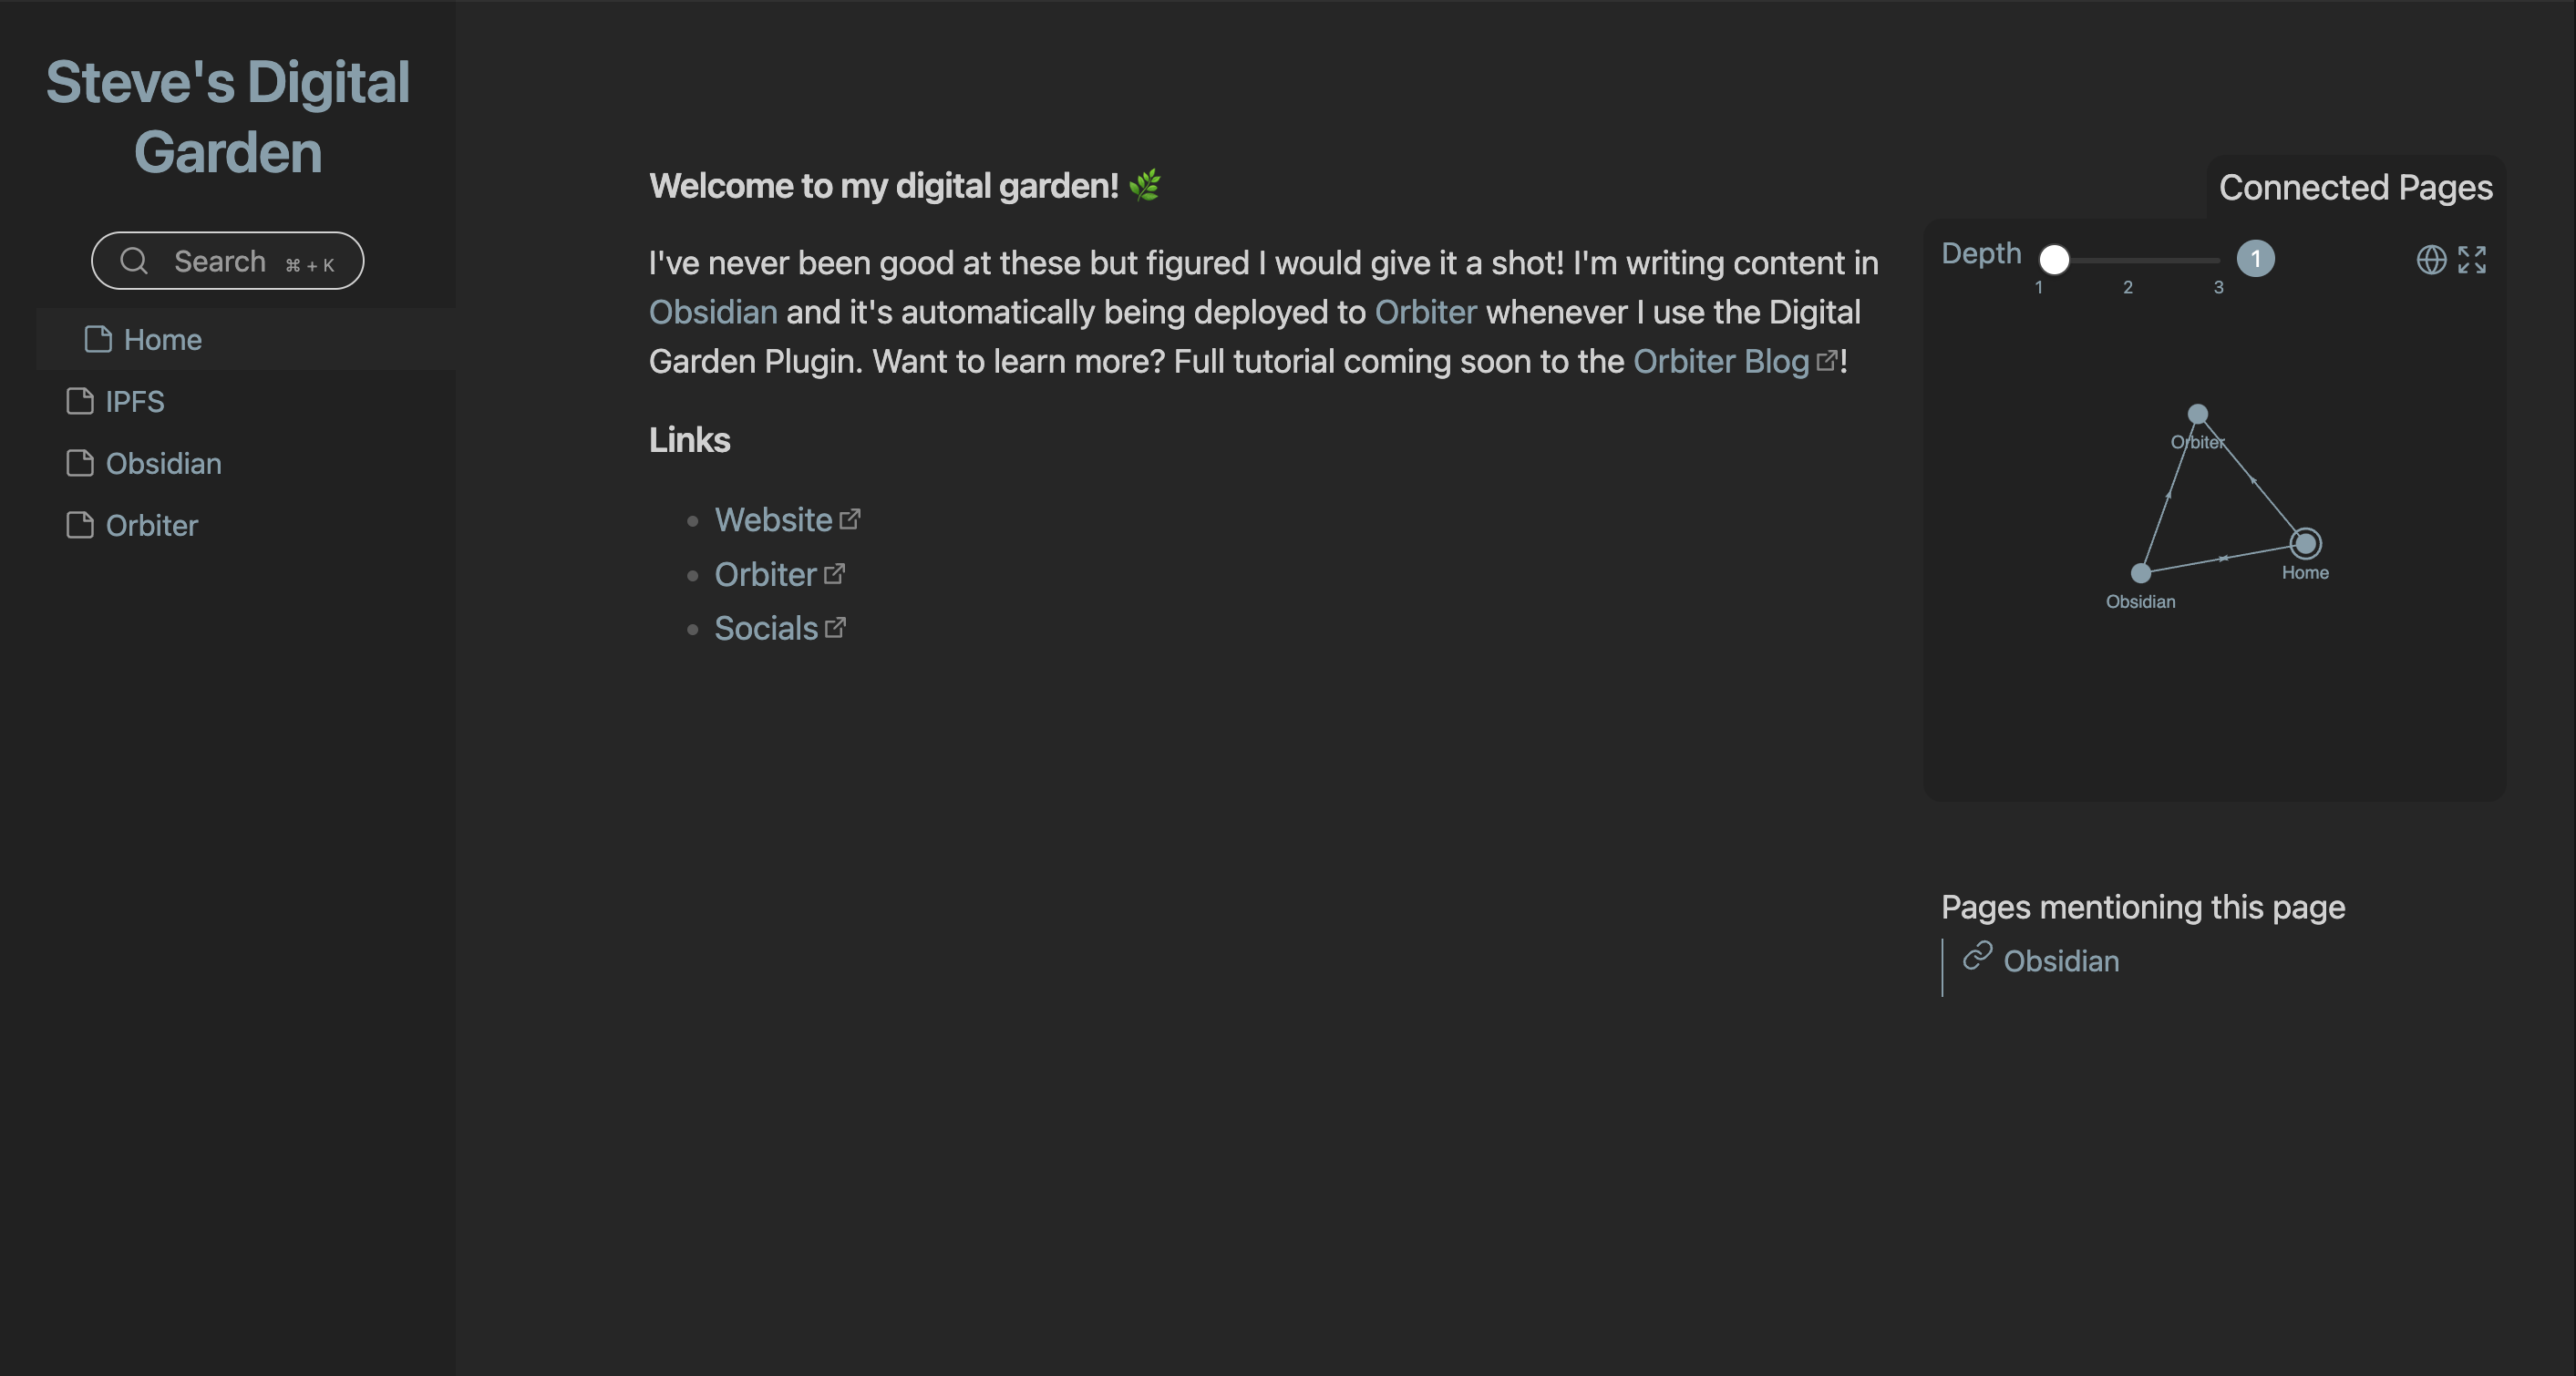
This is going to send a commit to our GitHub repo, and GitHub will take that data and update our site on Orbiter. Here’s a sneak peak at mine that I’ve been tweaking, which you can visit here.
Wrapping Up
Just like that we have an Obsidian vault hosted on IPFS and Base through Orbiter. Sure it does take a little work to setup initially but after it’s ready the work of adding new pages and publishing is a breeze. More importantly the philosophy of file over app is amplified to how your content is hosting.
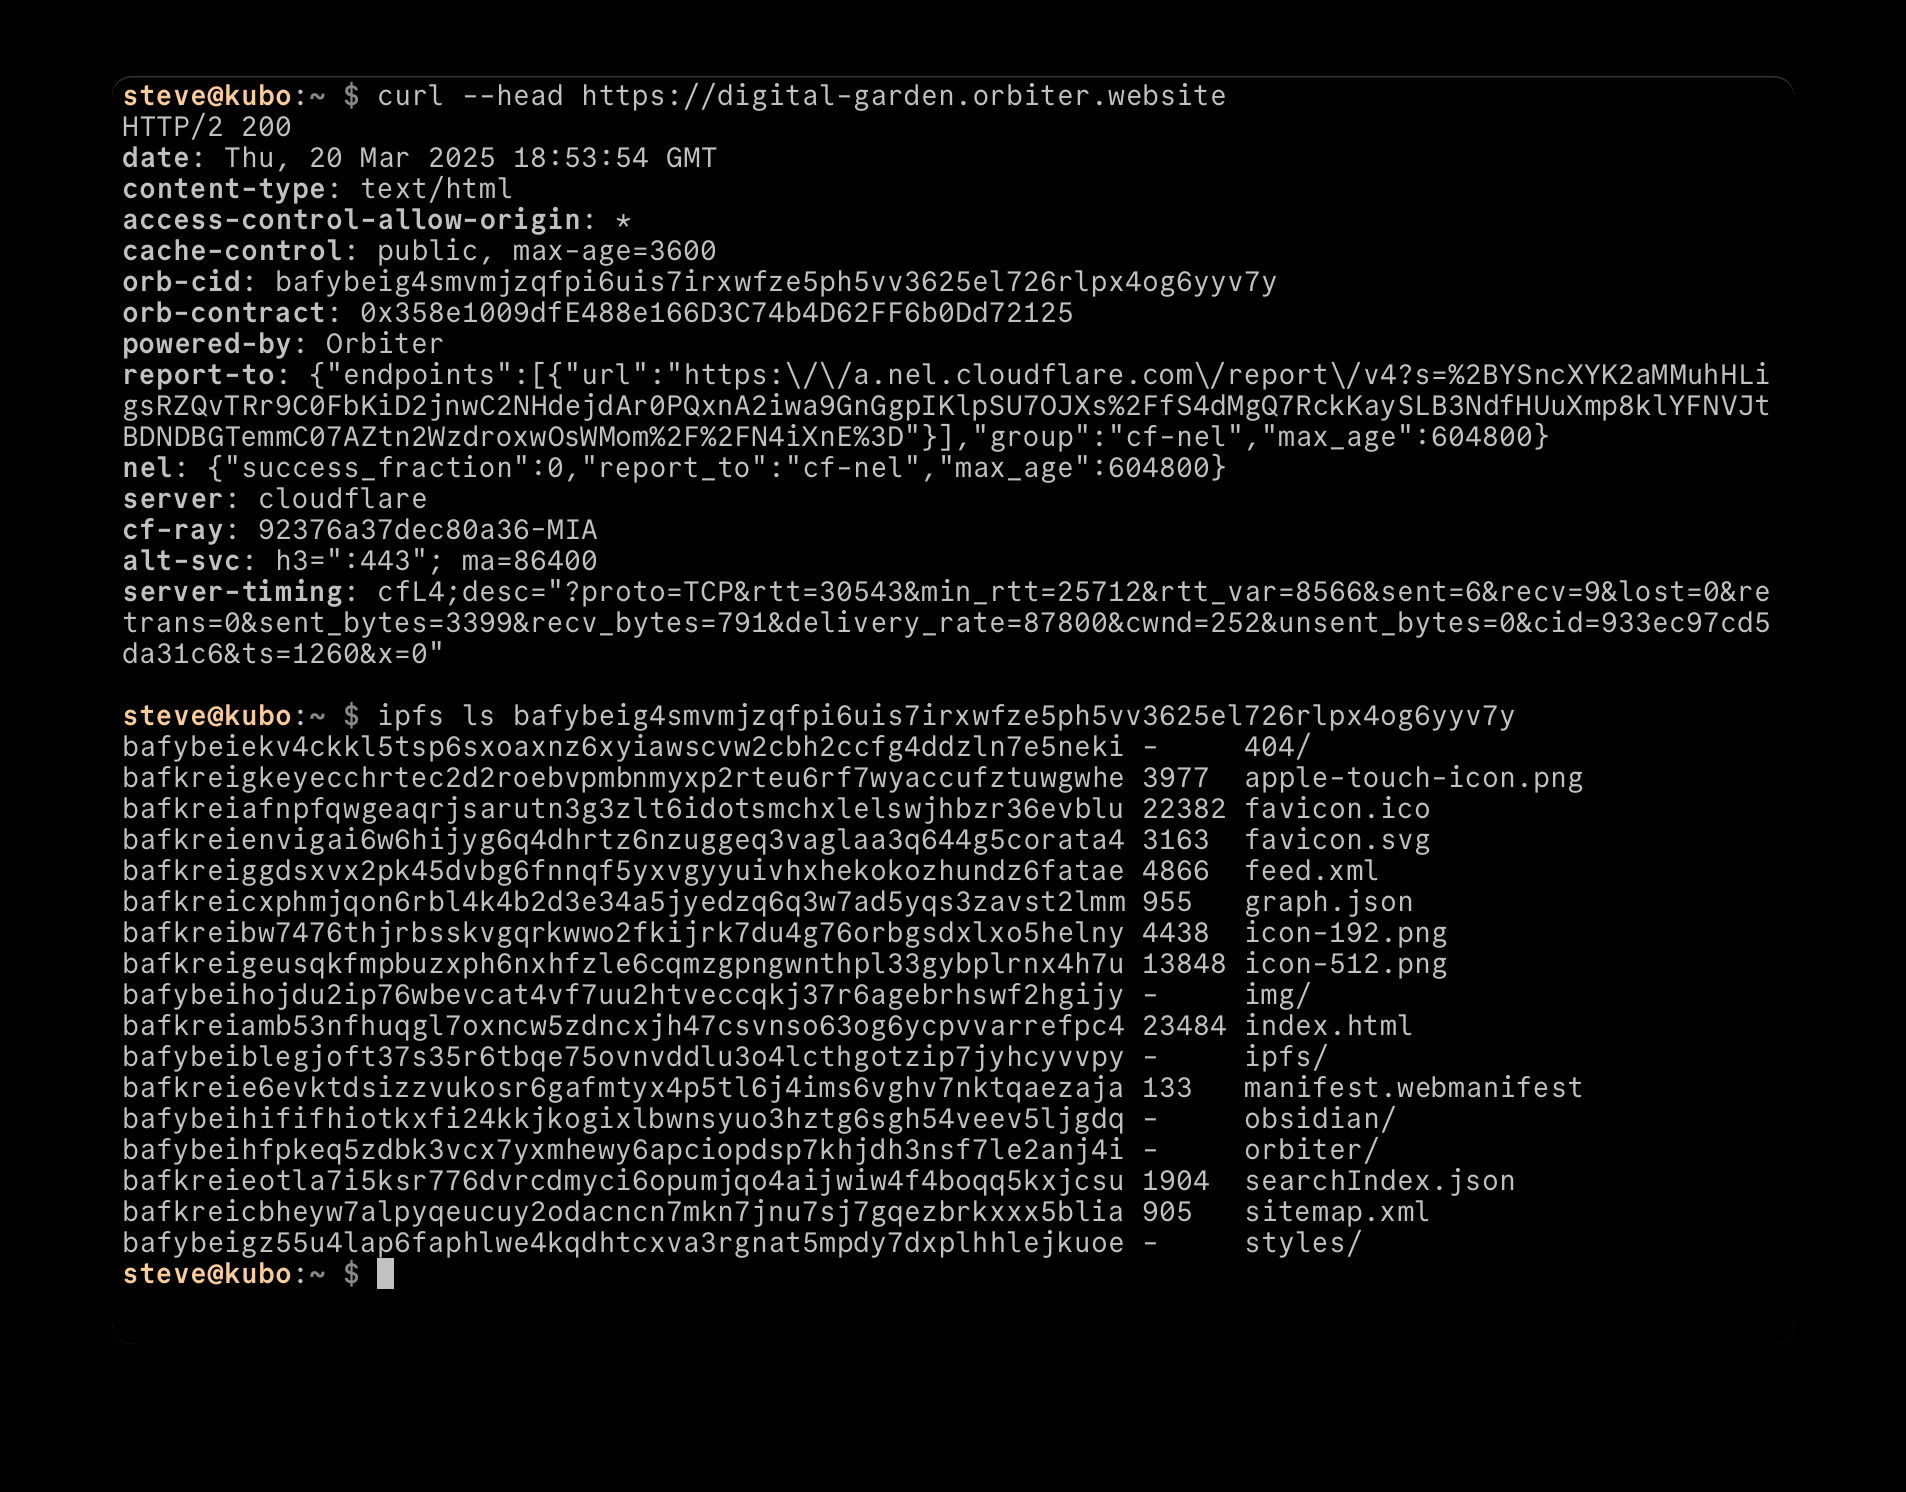
Every site hosted on Orbiter exposes the the IPCM contract address and the current IPFS CID in the response headers, so at any point you can view the immutable verified content on IPFS directly, or view it through an IPFS gateway like this one. With a local IPFS node you could backup your own content by pinning it, or you could access someone else’s content on a peer to peer level and have the assurance that it is what it says it is. IPFS enables true file ownership over a distributed network, and it’s why Orbiter is built on open web technologies and principles. Don’t take my word for it, launch your next site on Orbiter!