How To Migrate Your Project From Glitch To Another Host

Glitch was a wonderful community for online creators to build websites and apps while sharing them with the world. People could remix these sites and apps and make their own versions. The projects were default open and discoverable. Glitch provided hosting, and everything was available to the creators, remixers, and the lurkers.
However, Glitch recently announced that they will be ending hosting support.
On July 8, 2025 Glitch project hosting and user profiles will be shut down. Your Glitch dashboard will remain available as usual through the end of 2025, with access to download all of your code for your projects, as well as a new feature to set up redirects for your project subdomains so your URLs keep working.
This is unfortunate and it might leave some creators scrambling to find a new home for their creations. This guide is designed to help those creators, but it makes a critical assumption.
This guide is for projects that do not make use of server-side functionality. Most of the Glitch projects out there are static websites and web apps, built either with traditional HTML and JavaScript or with frameworks like React and Svelte. So, this guide will work for the majority of people. However, if you have a project that uses server technology, you will want to explore options like Heroku, Digital Ocean, and AWS.
Exporting Your Project
The first step to migrating away from Glitch is to export your project. Because Glitch was built on open principles, this is very easy to do.
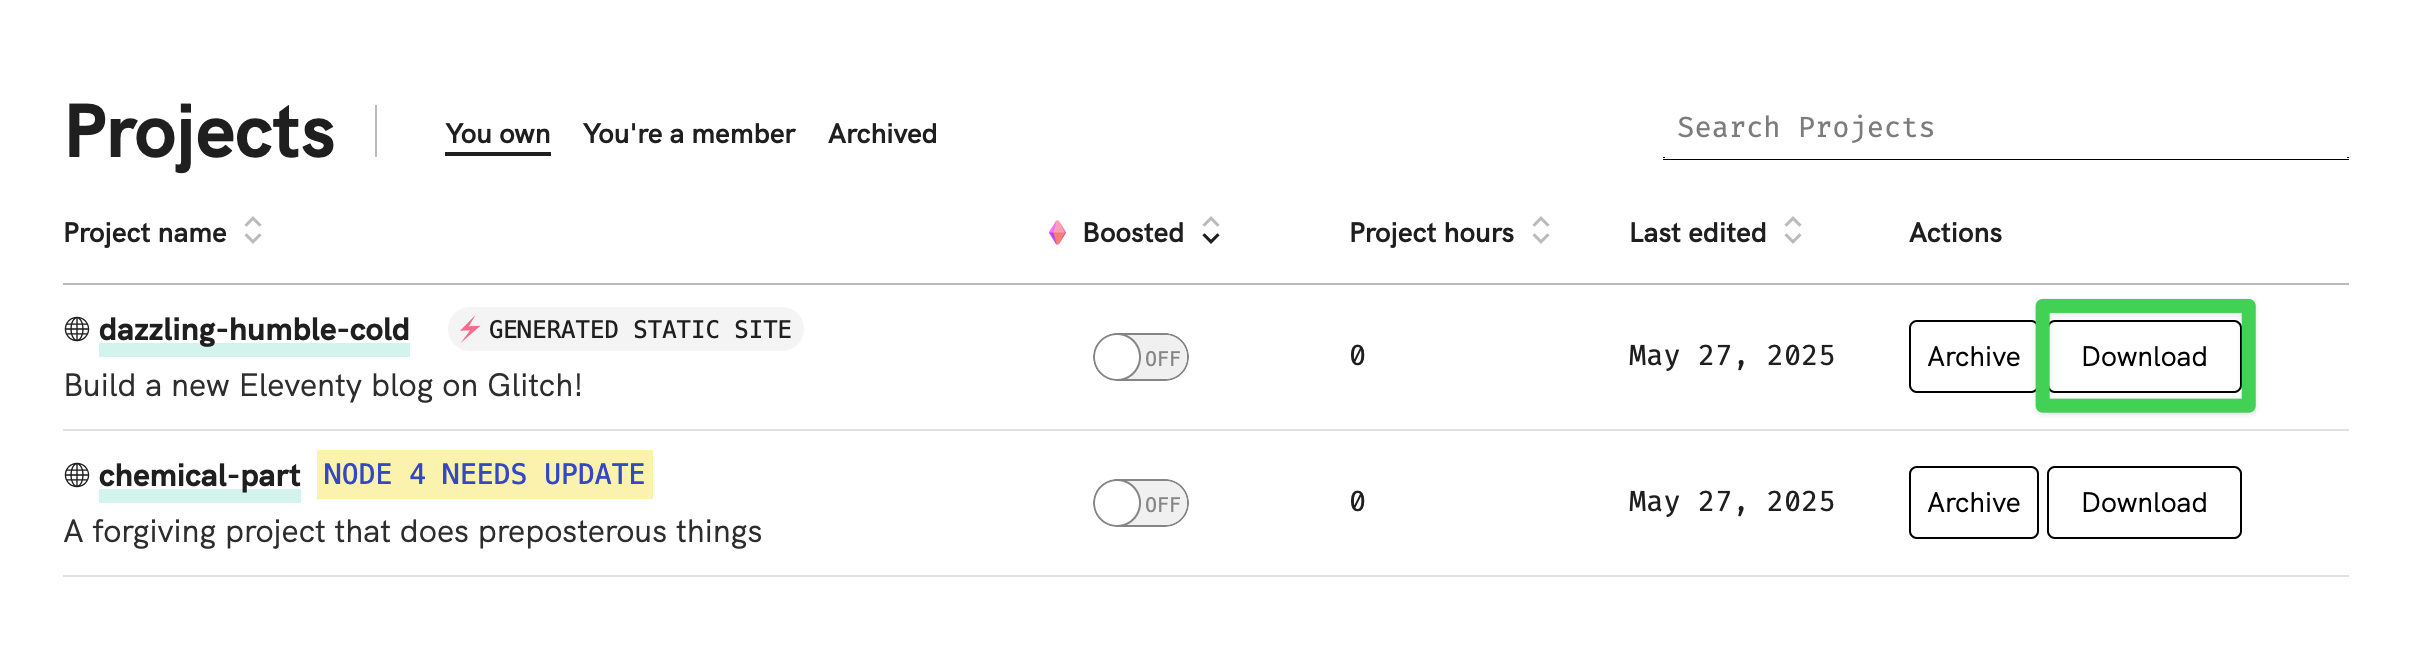
Log into your Glitch account, then go to your Dashboard. There, you will see your projects. To the far right, you’ll see the download button for the project. When you click this, it will download your project as a tgz file, which is simply a compressed file format similar to zip. Most computers and decompress these projects without any special software simply by double clicking on it.
When you’ve decompressed the files, you should see a project folder called app or something similar. Inside that folder, you’ll find a build folder. It seems Glitch has standardized this folder naming, but in the event you don’t see a folder with this name, look for something like dist, out, or _site.
The contents of this build folder are what you’ll need for your migration.
Hosting Options
Unfortunately, hosting has largely become a spider’s nest of complication over the years as many platforms have grown and have tried to adapt to serve as many use cases as possible. That said, there are some simple solutions for hosting static websites and apps.
Let’s explore a few.
Orbiter
Orbiter is purpose-built for static site hosting. React, Svelte, Vue, Astro, static site generators, and vanilla HTML will all feel right at home here. Additionally, Orbiter is incredibly simple to use.
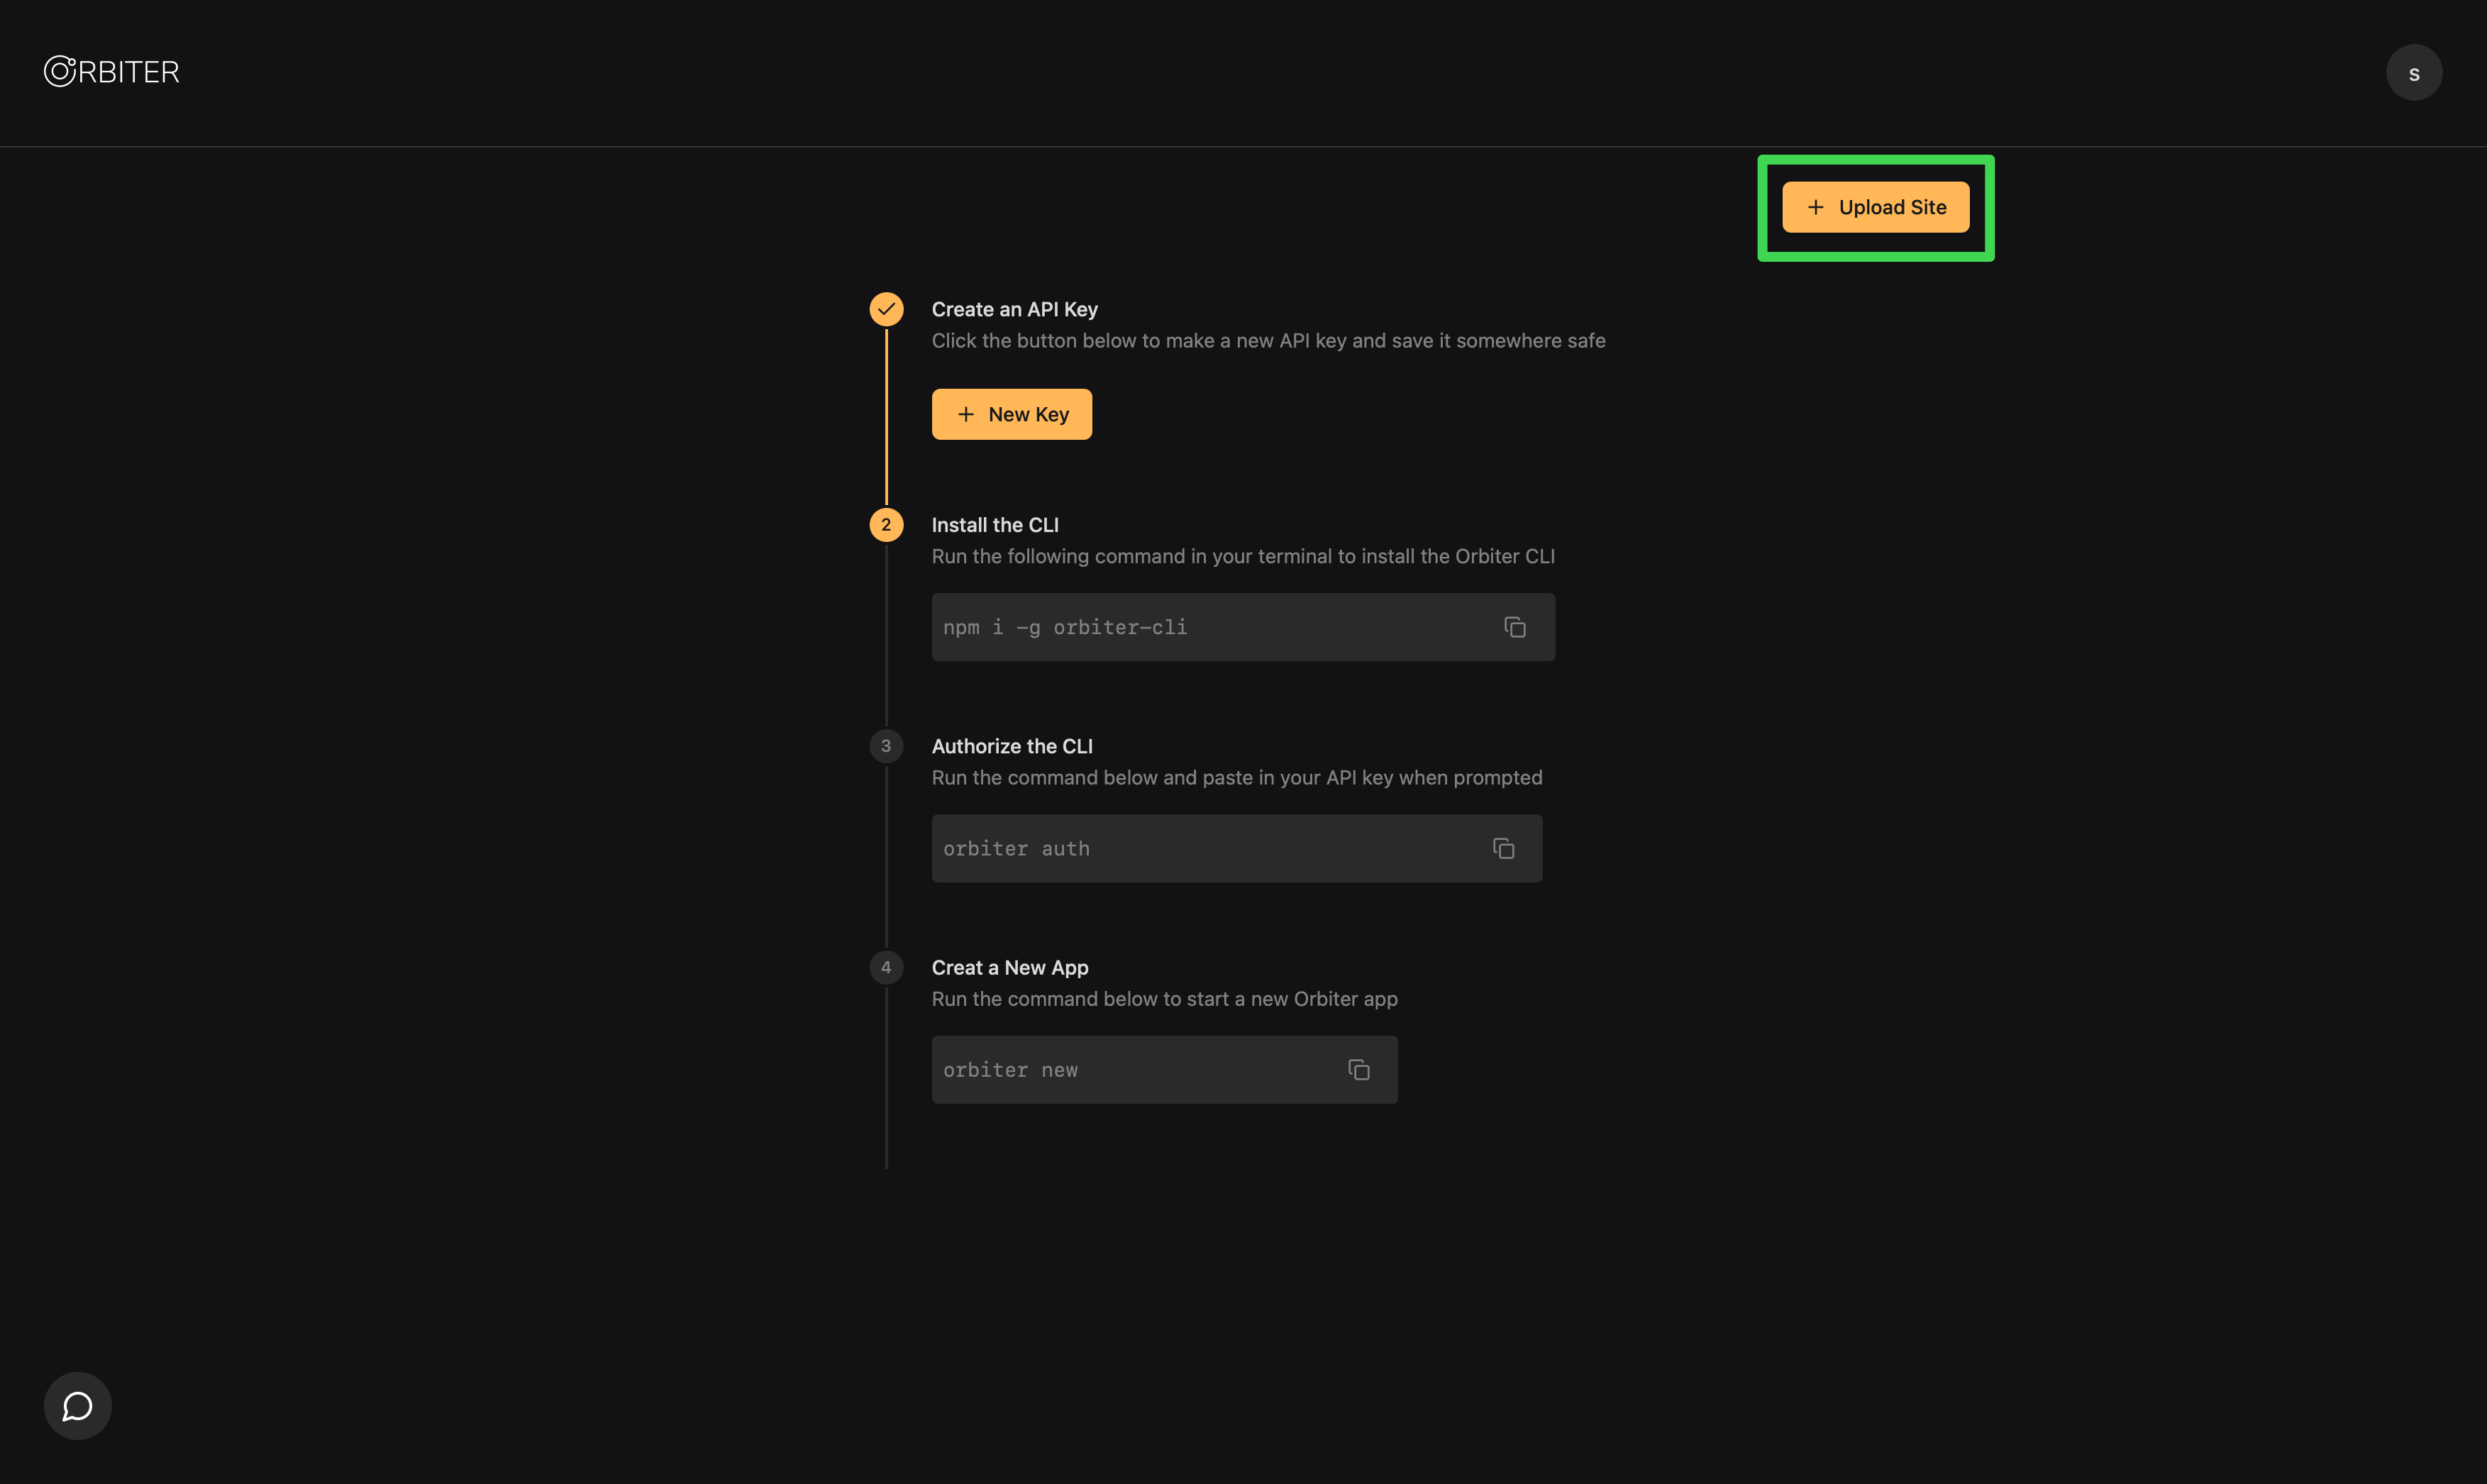
First, sign up for a free account. Once you’ve done so, you’ll see a button asking you to upload a new site. Either click that button, choose the folder option, and select your build folder from your computer, or you can just drag that build folder into your Orbiter dashboard.
You’ll be asked to select a subdomain for your site, and within seconds your site will be online.
If you’d prefer to use a CLI tool or if you use Github, you can consider the Orbiter CLI and Github Action.
Netlify
Netlify used to be the go-to solution for static website hosting. In fact, their founder coined the term Jamstack (JavaScript, APIs, Markup). However, as Netlify has scaled and has turned their attention to enterprise customers, their hosting solution has grown a bit more complicated.
That said, it’s still easier than some other providers. Let’s explore.
First, sign up for a free Netlify account here. You’ll need to fill out some onboarding questions and give your project a name.
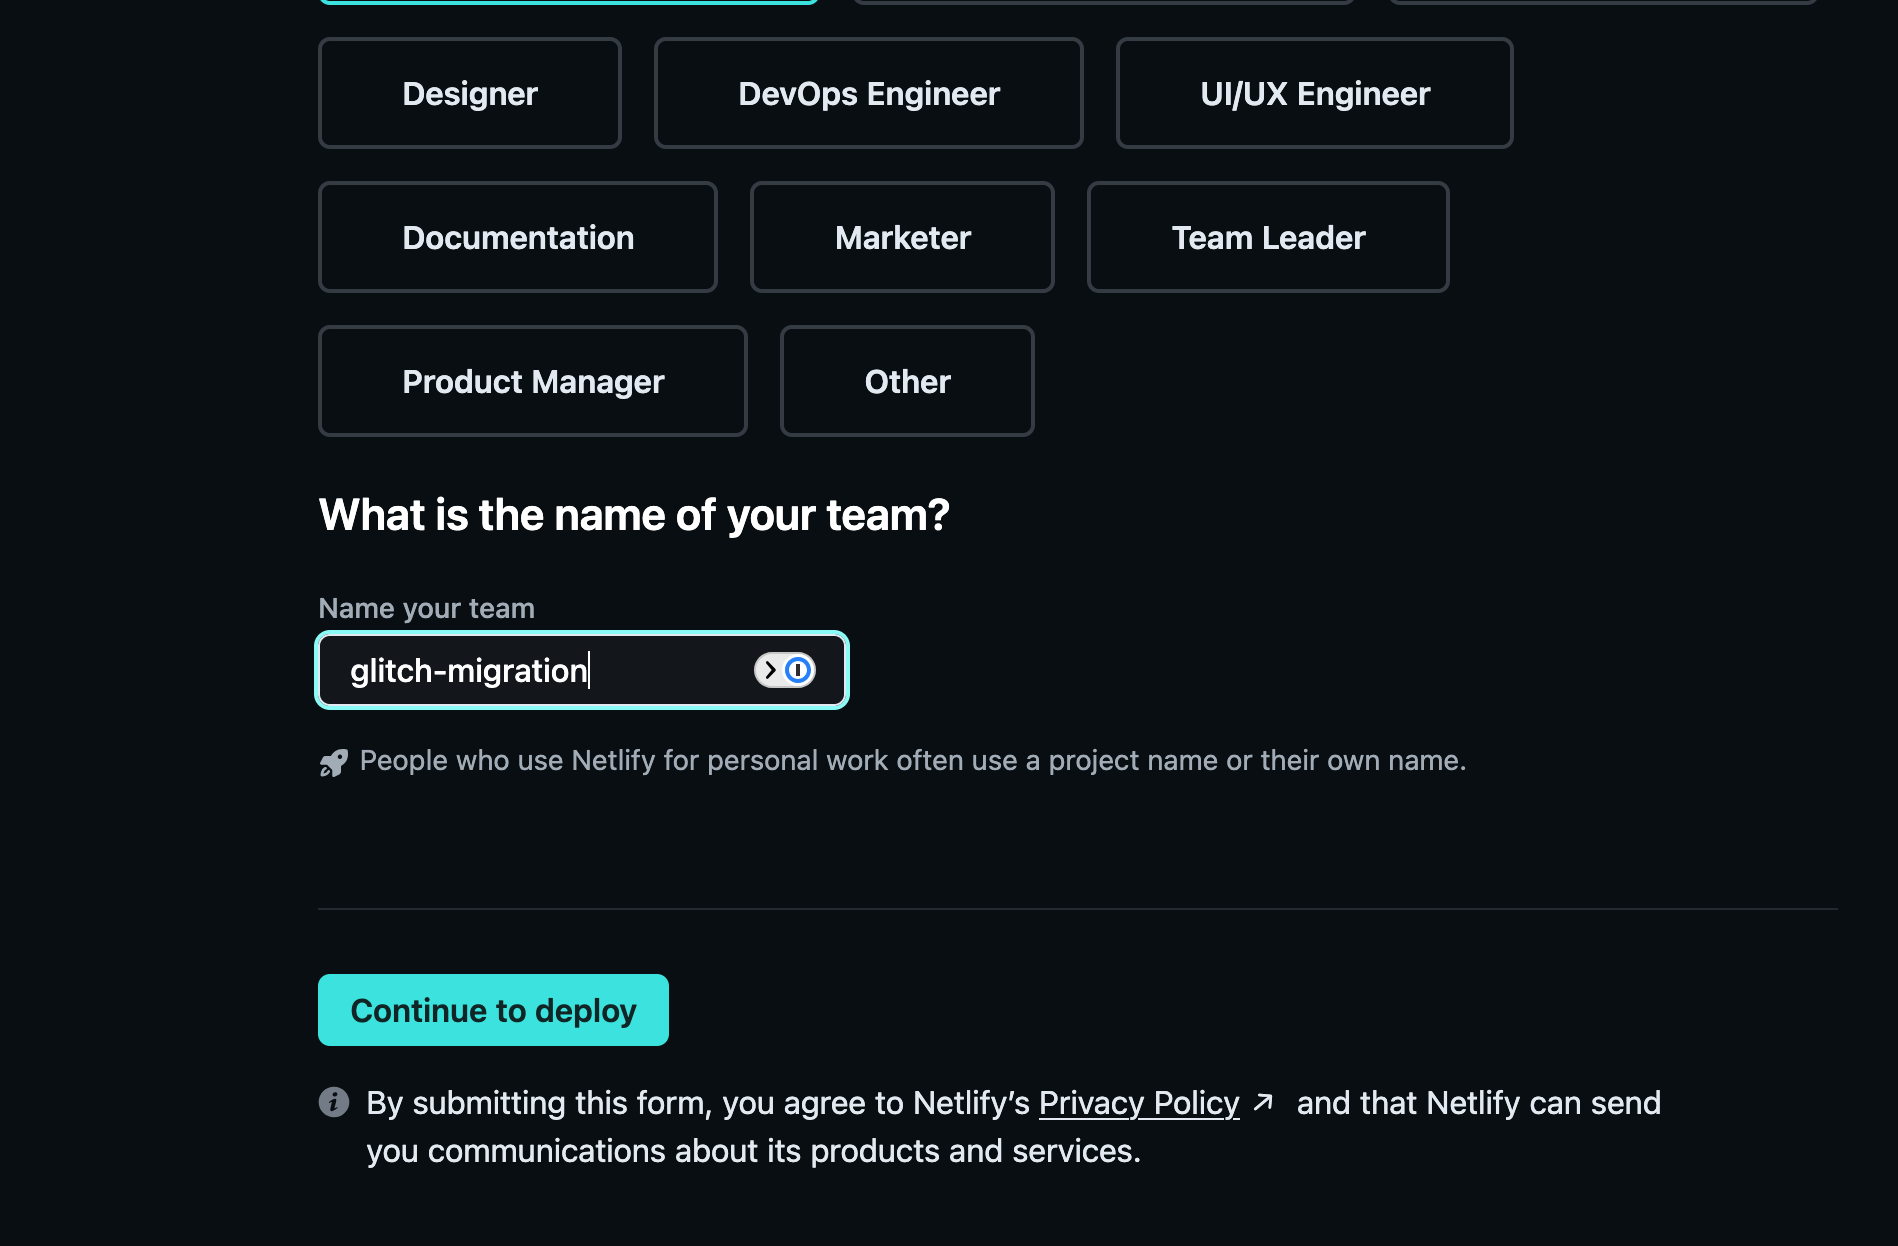
Then, you’ll need to click “Continue to deploy”. Here, you’ll have the option to deploy the project from a git repository on Github, Gitlab, or Bitbucket. If you don’t have your project hosted using a git repository, you can click the small link below those options to use Netlify Drop.
On the Netlify Drop screen, similar to Orbiter, you can select a folder of assets and upload your project.
Vercel
Vercel has become one of the most popular hosting platforms on the market because of their support for Next.js. However, they have suffered from the scale and need to support a variety of use cases in a much more significant way than Netlify. But, you can still host your Glitch project on Vercel. Here’s how.
First, sign up for a free Vercel account. Next, you’ll need to go to Github (or Gitlab), sign up for an account if you don’t have one, and create a repository. If you know your way around the command line, you can initialize a local git repo for your downloaded Glitch project then push that repository to Github. If you don’t know your way around a command line, Github and Gitlab both support uploading your project directory. This takes a few steps and is not the most obvious flow, but it is possible.
Now, you’ll need to go back to Vercel and create a new project. When you do so, Vercel only gives you the option to connect to a remote repository to deploy. So you’ll need to authorize Github (or Gitlab), then you’ll need to choose the new repository you created. From there, Vercel will try to detect some information about your repository such as the build command and what type of project it is. They may get this wrong, so check the settings before continuing.
Finally, when you deploy, Vercel will clone the repository onto their own machine, install project dependencies, run the build command, then host the final site.
Conclusion
Glitch was a great platform designed to show off the creativity of people on the web. Unfortunately, they are ending their app and site hosting. This guide provided alternative hosting solutions from Orbiter, Netlify, and Vercel.
The choice is yours, but you do have options to keep those Glitch projects alive!
Signup for our Newsletter